Table of Contents
- Booking Management
- Manage Shelter Bookings
- Go to mtsterlingparkdistrict.com
- 1. Mt Sterling Shelter Bookings
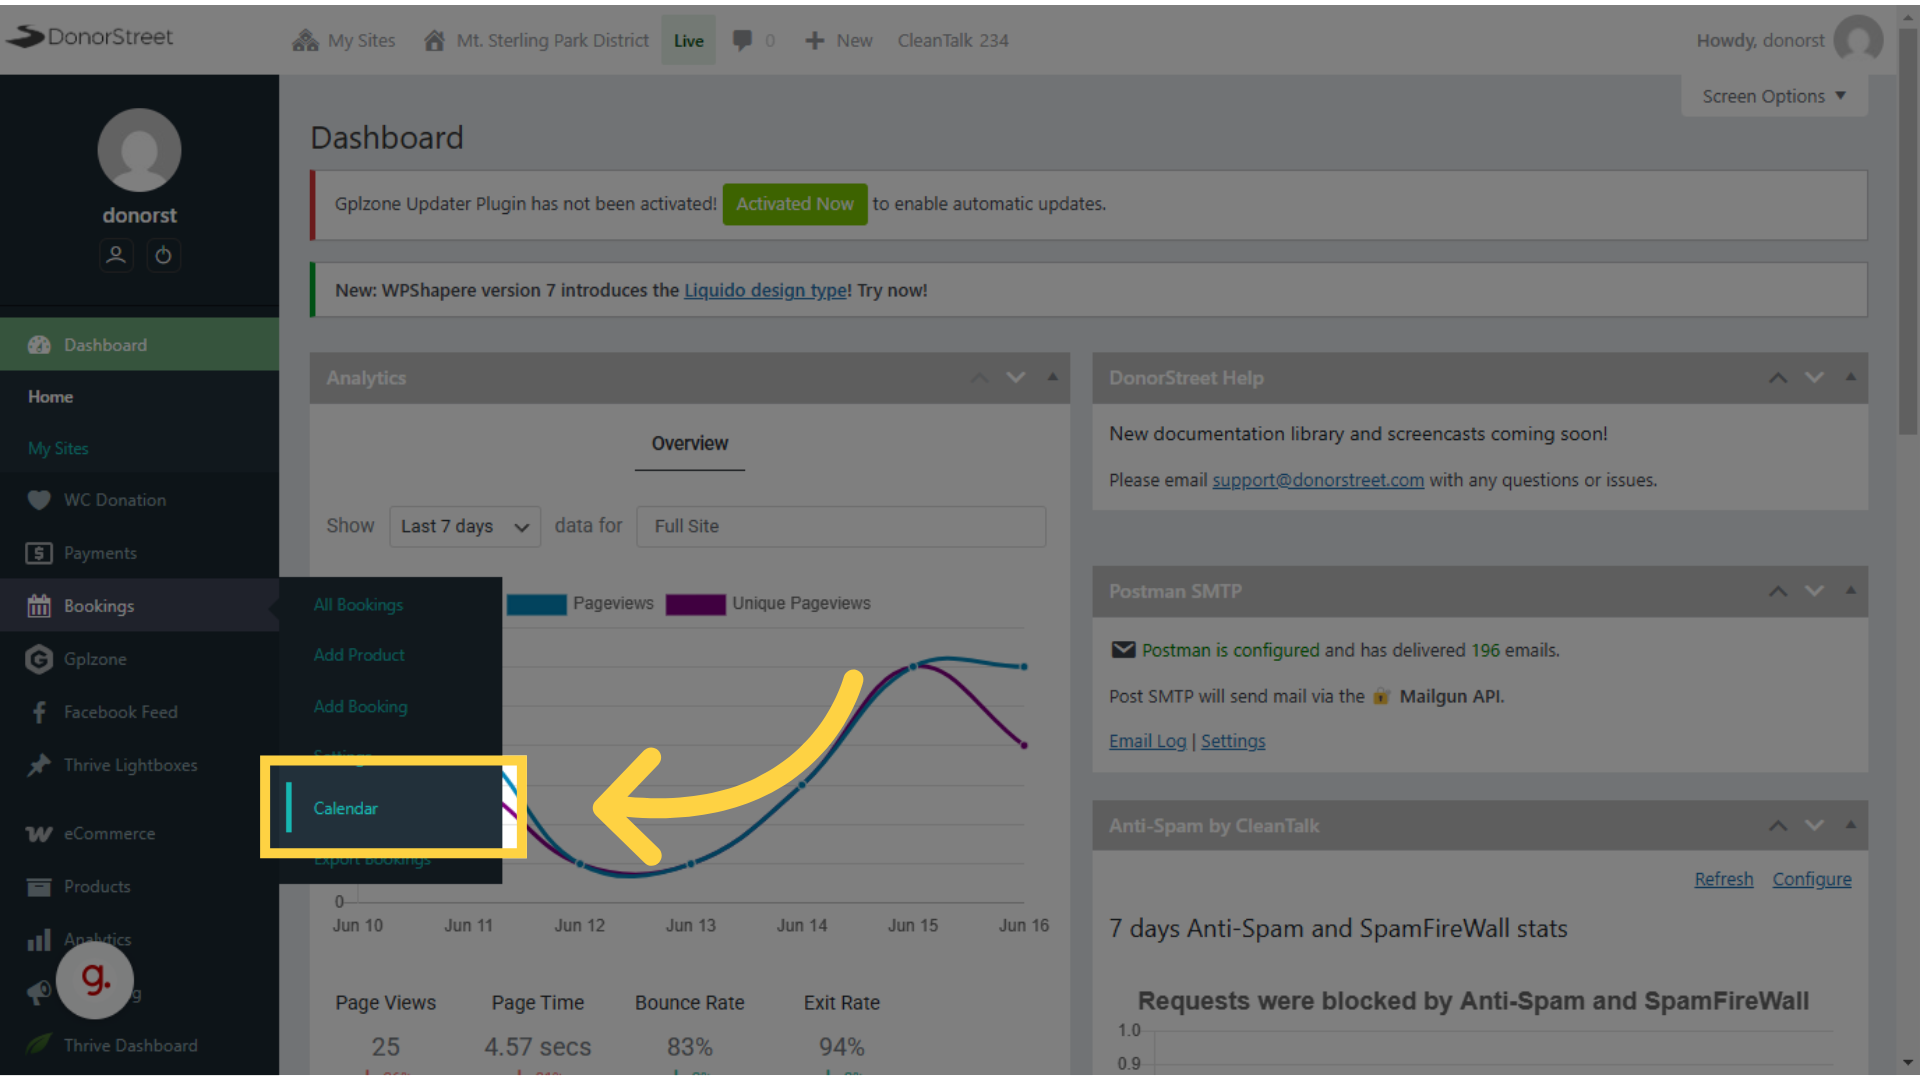
- 2. Click Bookings > Calendar
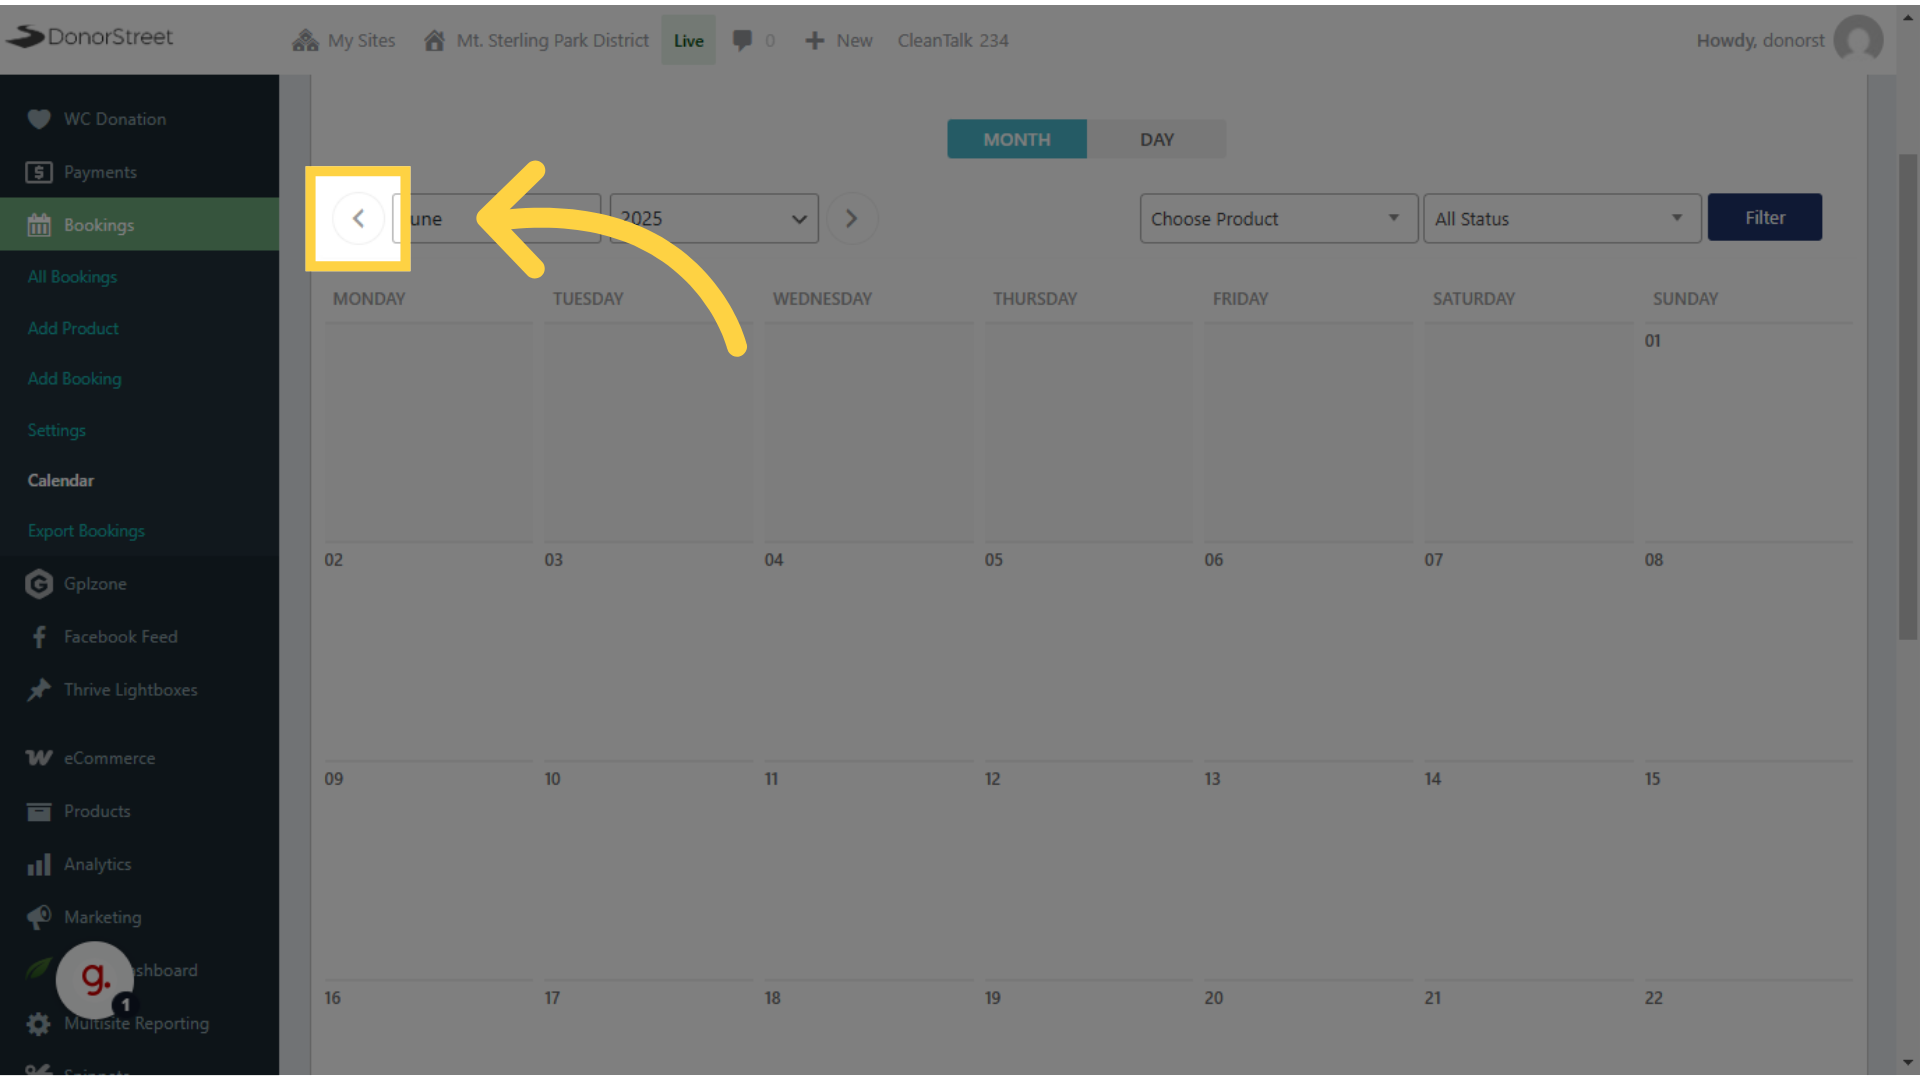
- 3. Use arrows or dropdown to navigate months
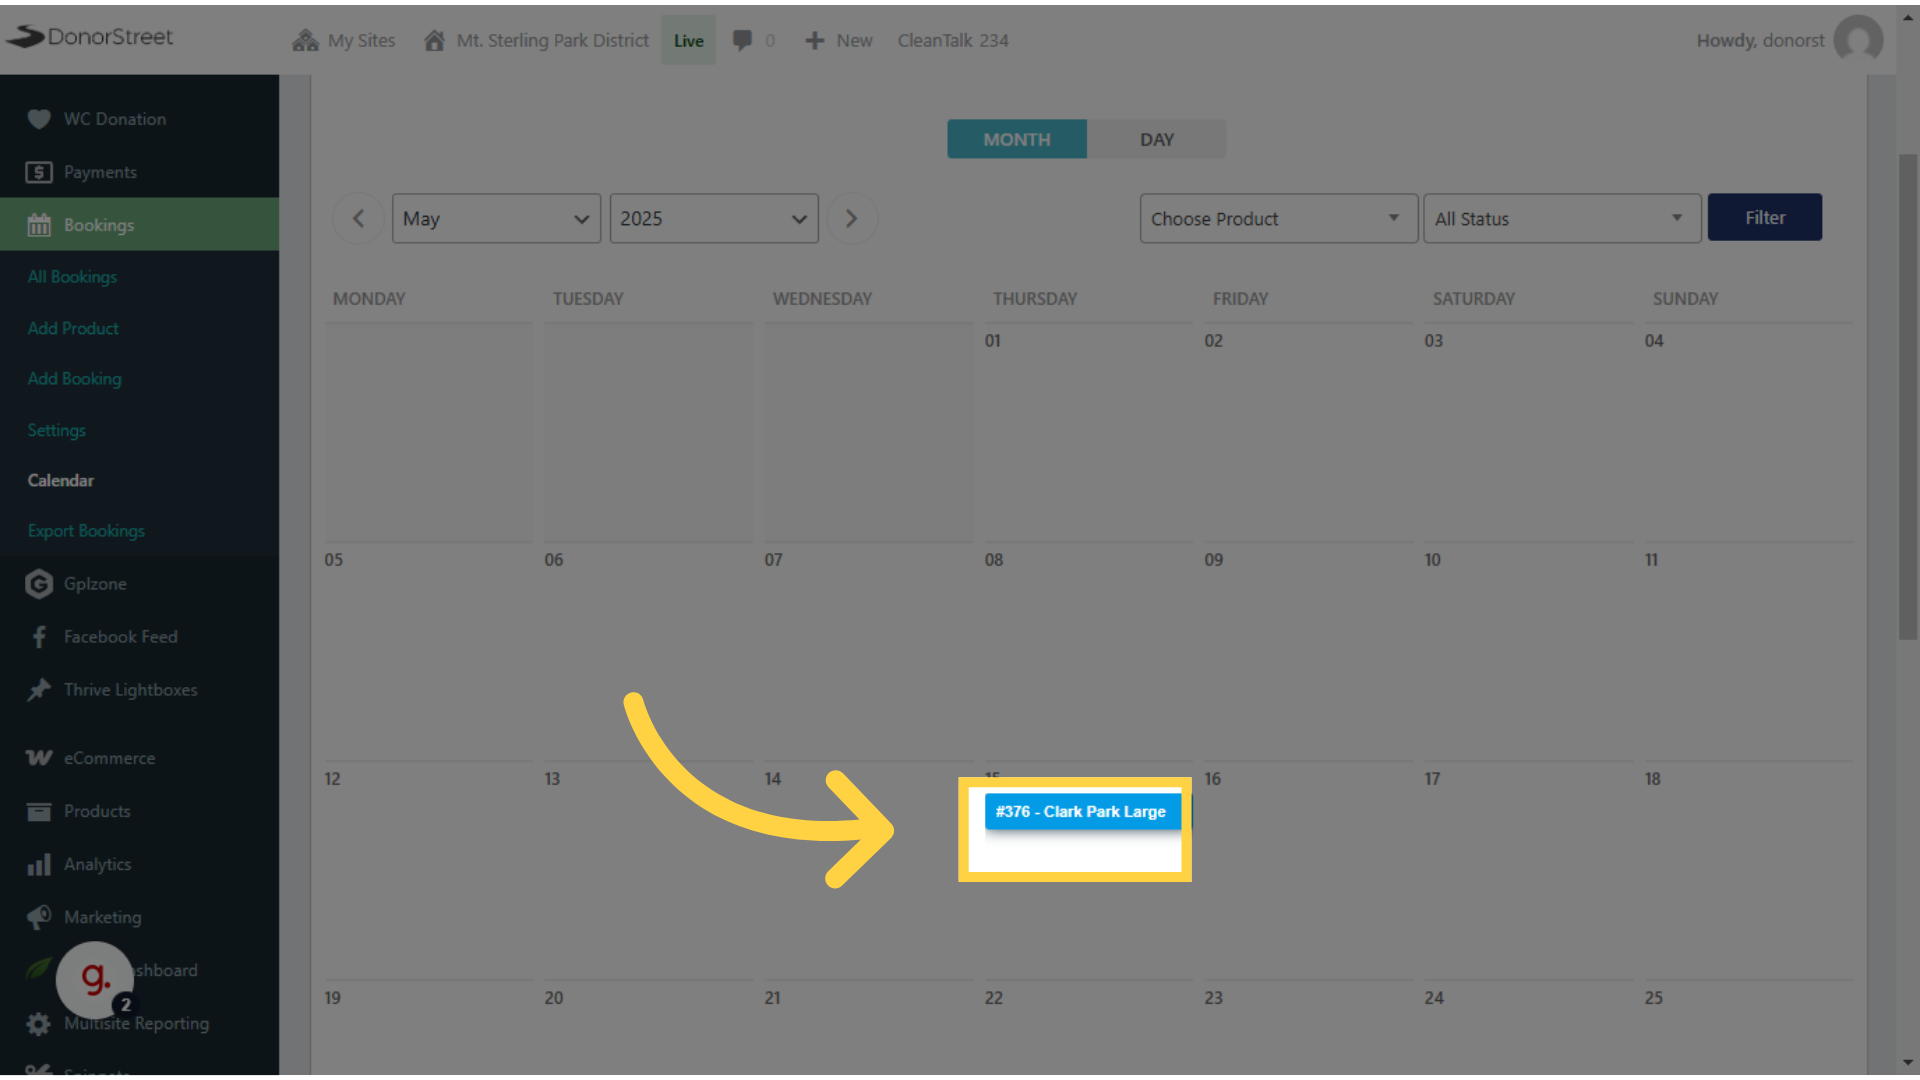
- 4. Click any booking # to see details
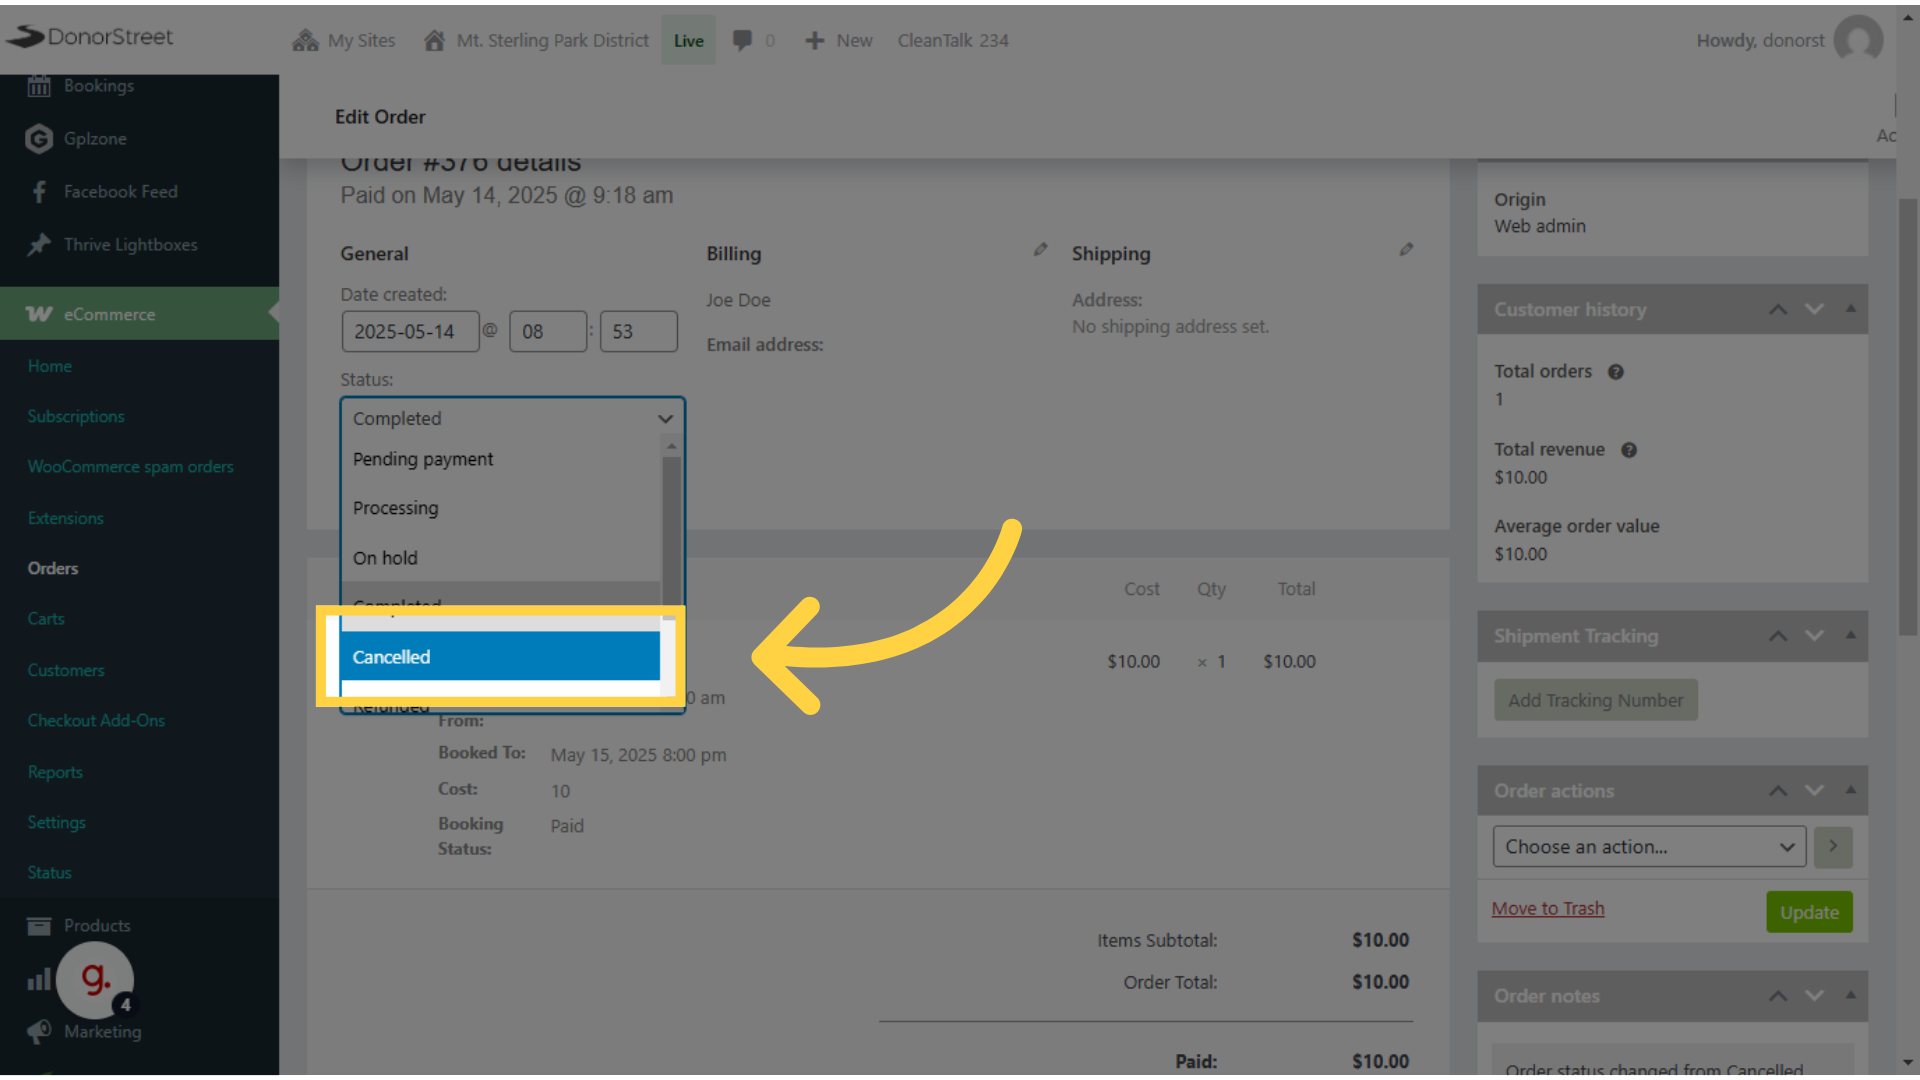
- 5. If you need to cancel for a user, use the status dropdown
- 6. Click "Cancelled" if needed to manually cancel for the user.
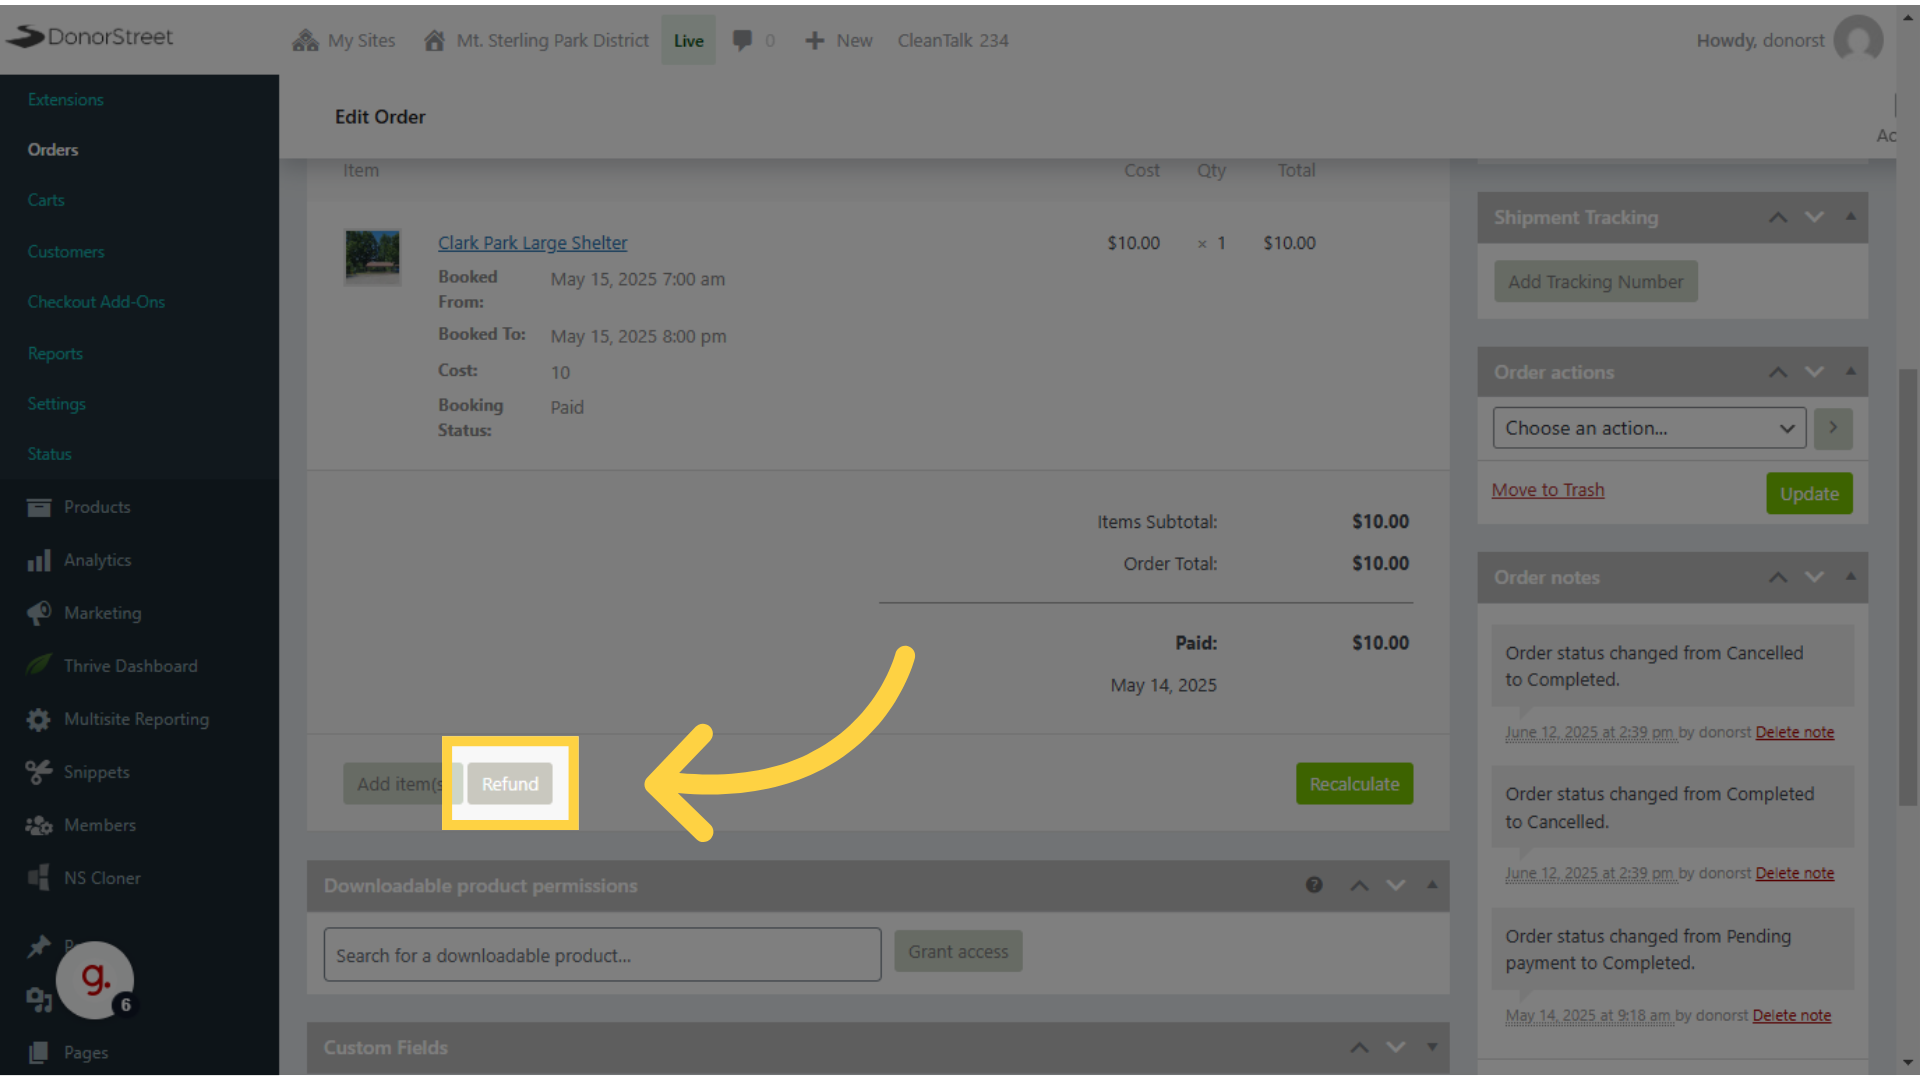
- 7. If you need to also refund the fee, Click "Refund"
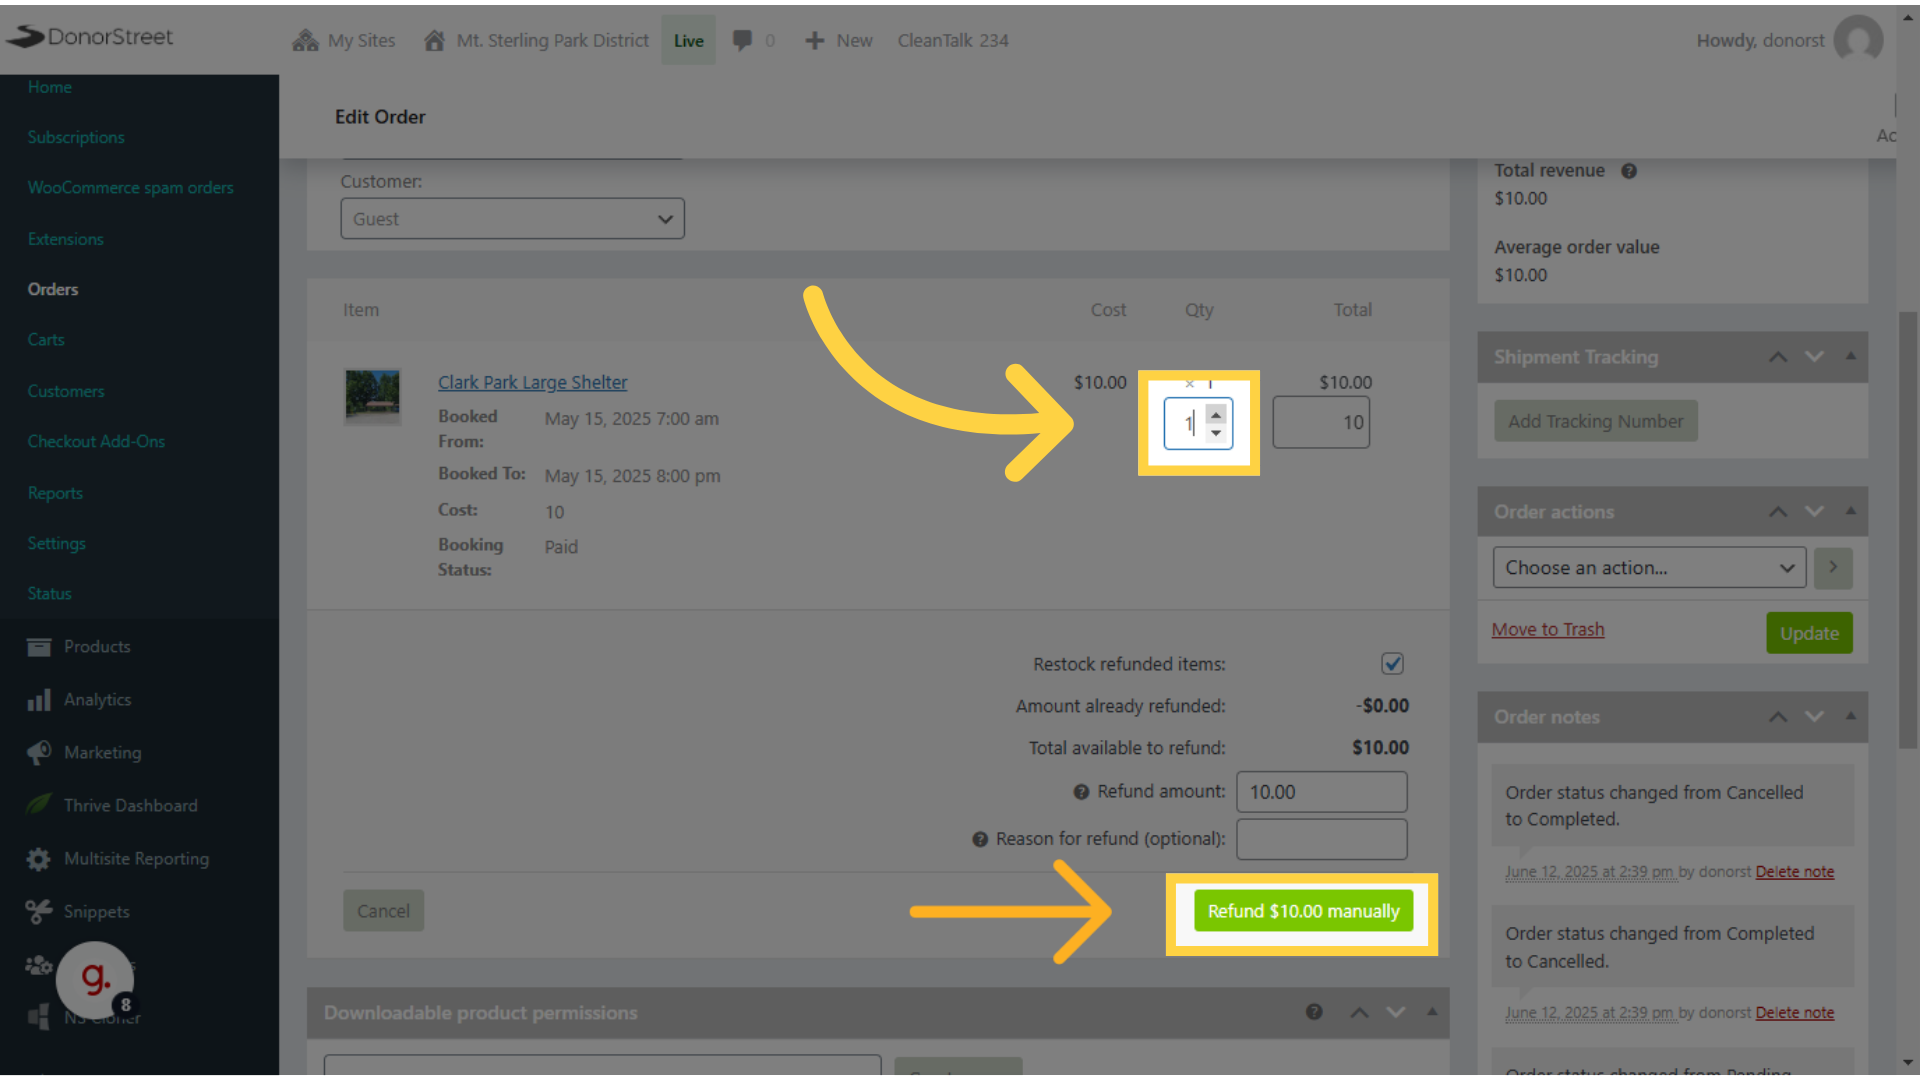
- 8. Use the arrow to refund "1" next to the booking fee
- 9. Click "Update"
- 10. To manually add a booking, Click "Calendar"
- 11. Click "Add Booking"
- 12. Start typing a name or email if previous customer, otherwise use "Guest"
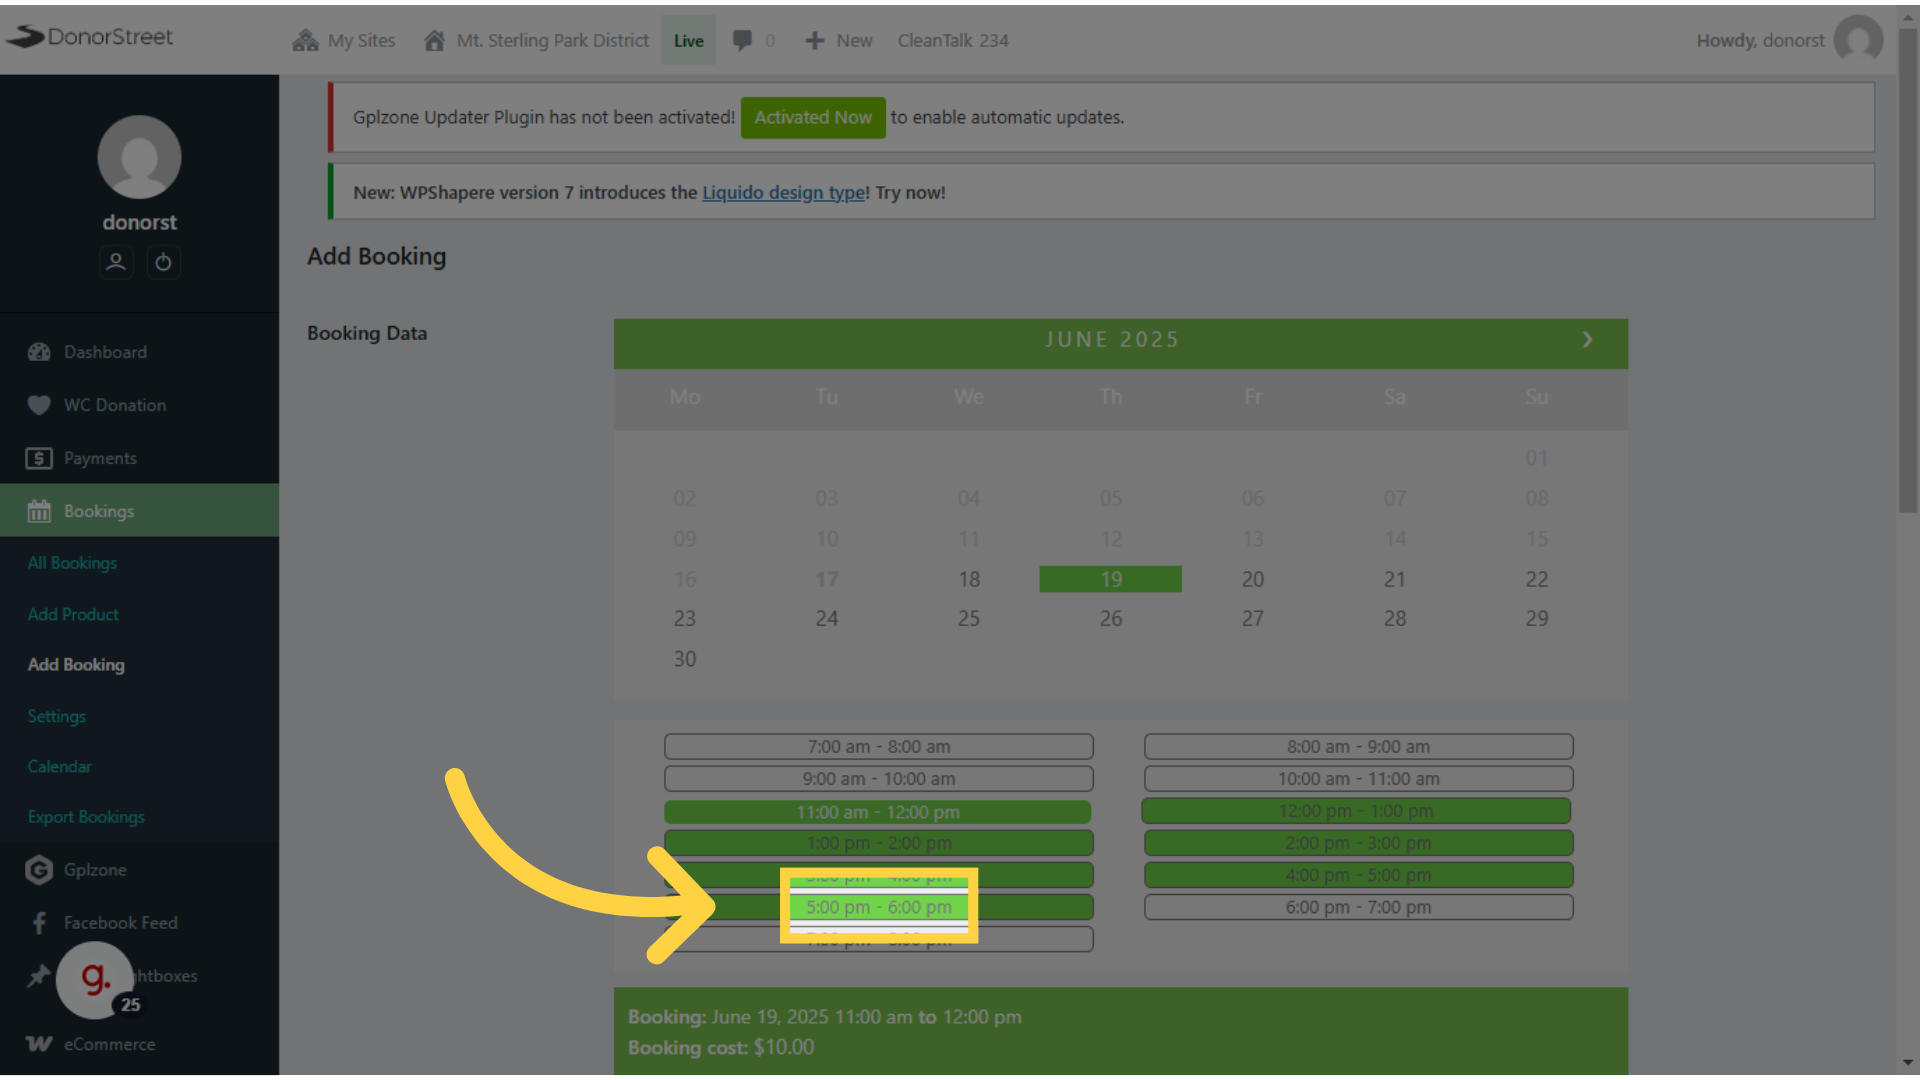
- 13. Select Shelter
- 14. Click "Create a new order."
- 15. Click "Next"
- 16. Choose a Date
- 17. Choose Start Time
- 18. Choose End time
- 19. Select to send an invoice for online payment or just leave blank if they pay directly.
- 20. Click "Add Booking"
- 21. To add contact info to this booking, use the edit (pencil) icon.
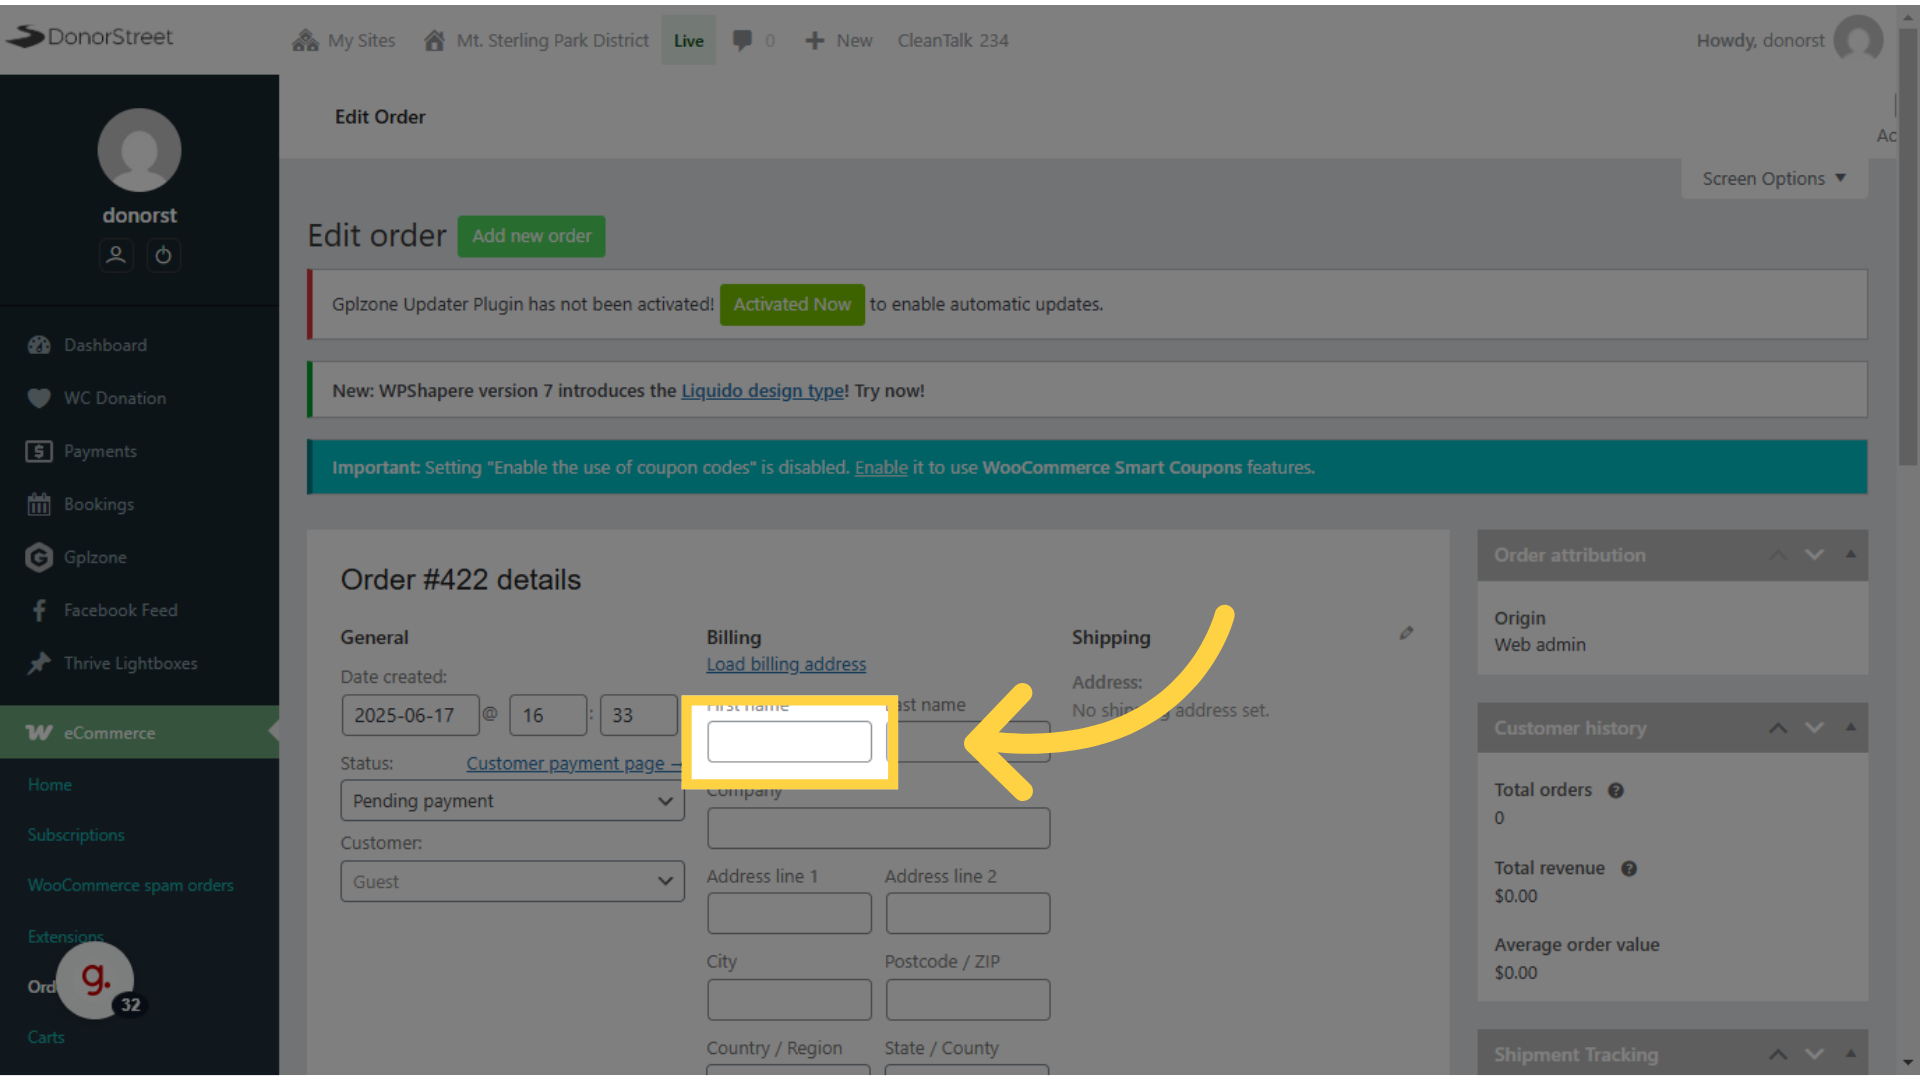
- 22. Click "First name"
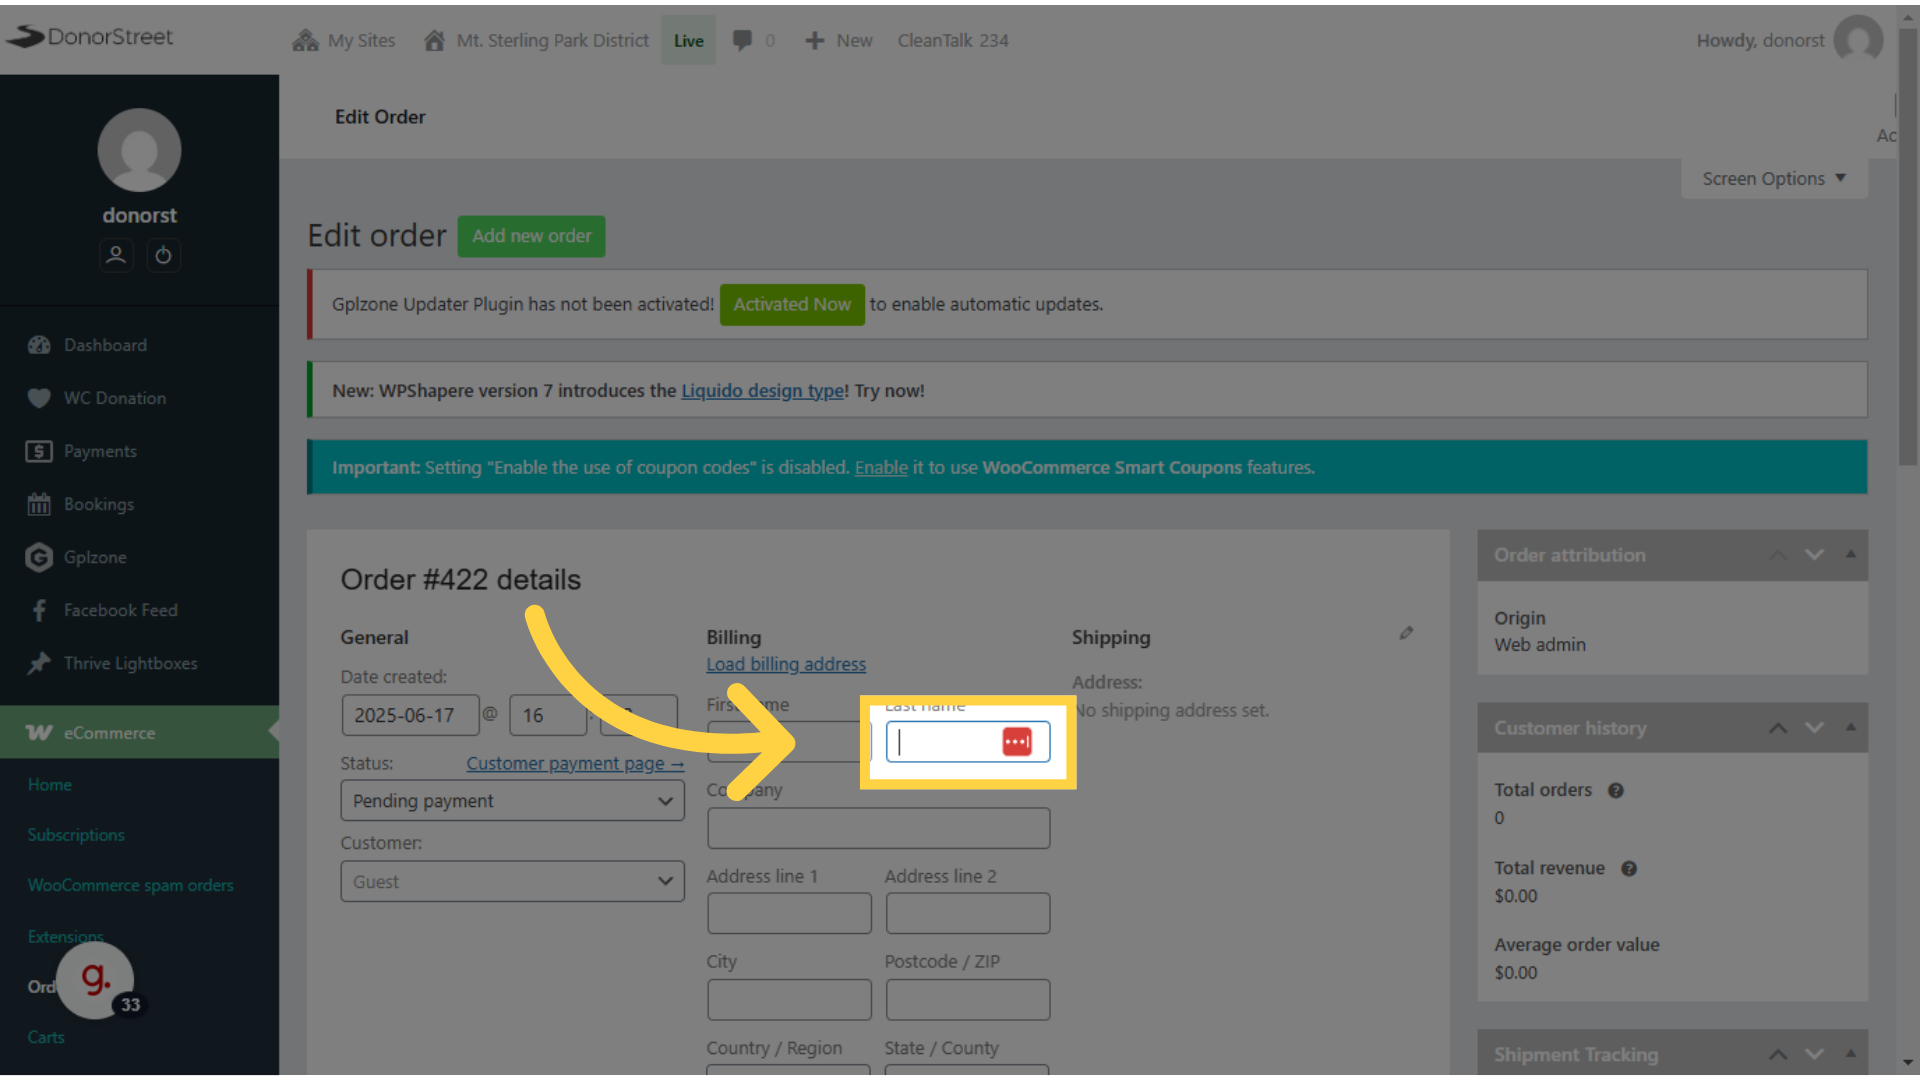
- 23. Last Name
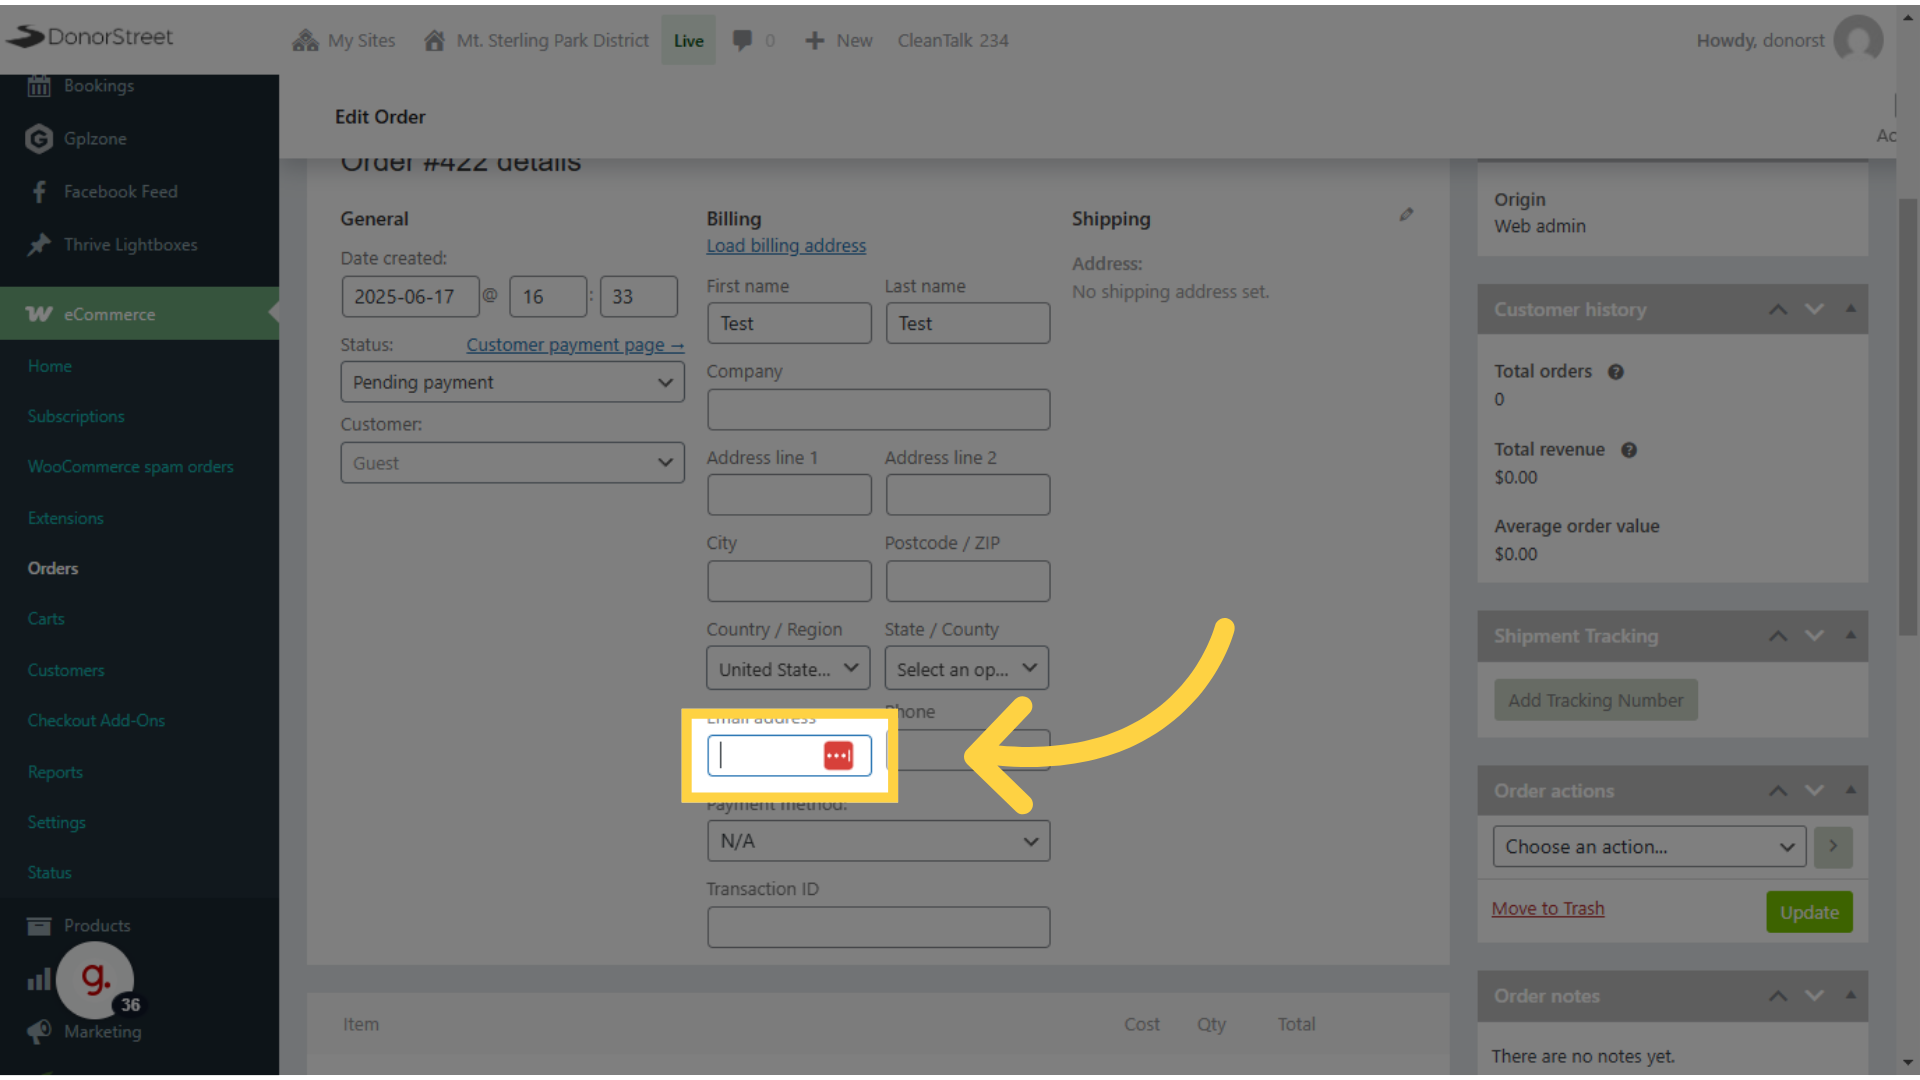
- 24. Click "Email address"
- 25. Click "Update"
Booking Management #
This is a quick overview of the administrative functions on the new bookings feature for the Mount Sterling website.
Go to mtsterlingparkdistrict.com #
1. Mt Sterling Shelter Bookings #
Everything starts from the normal website administrative dashboard.
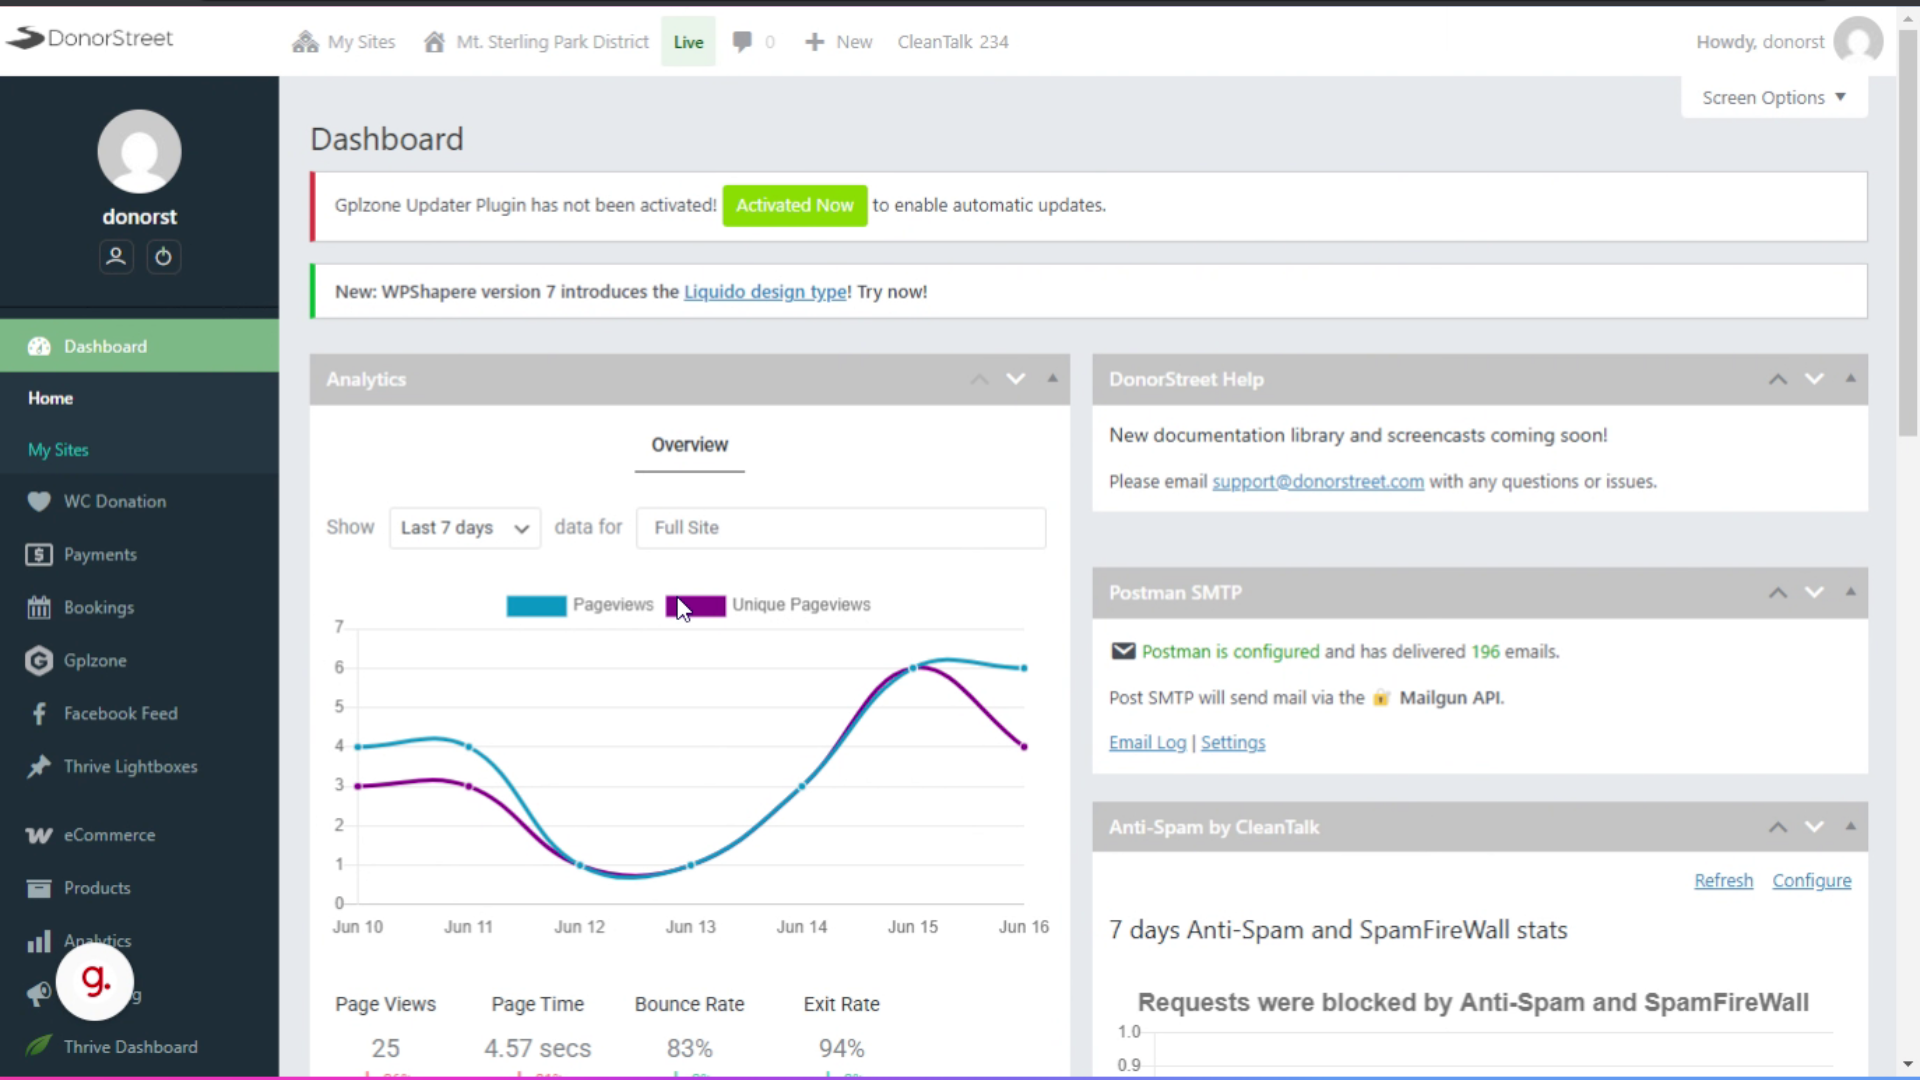
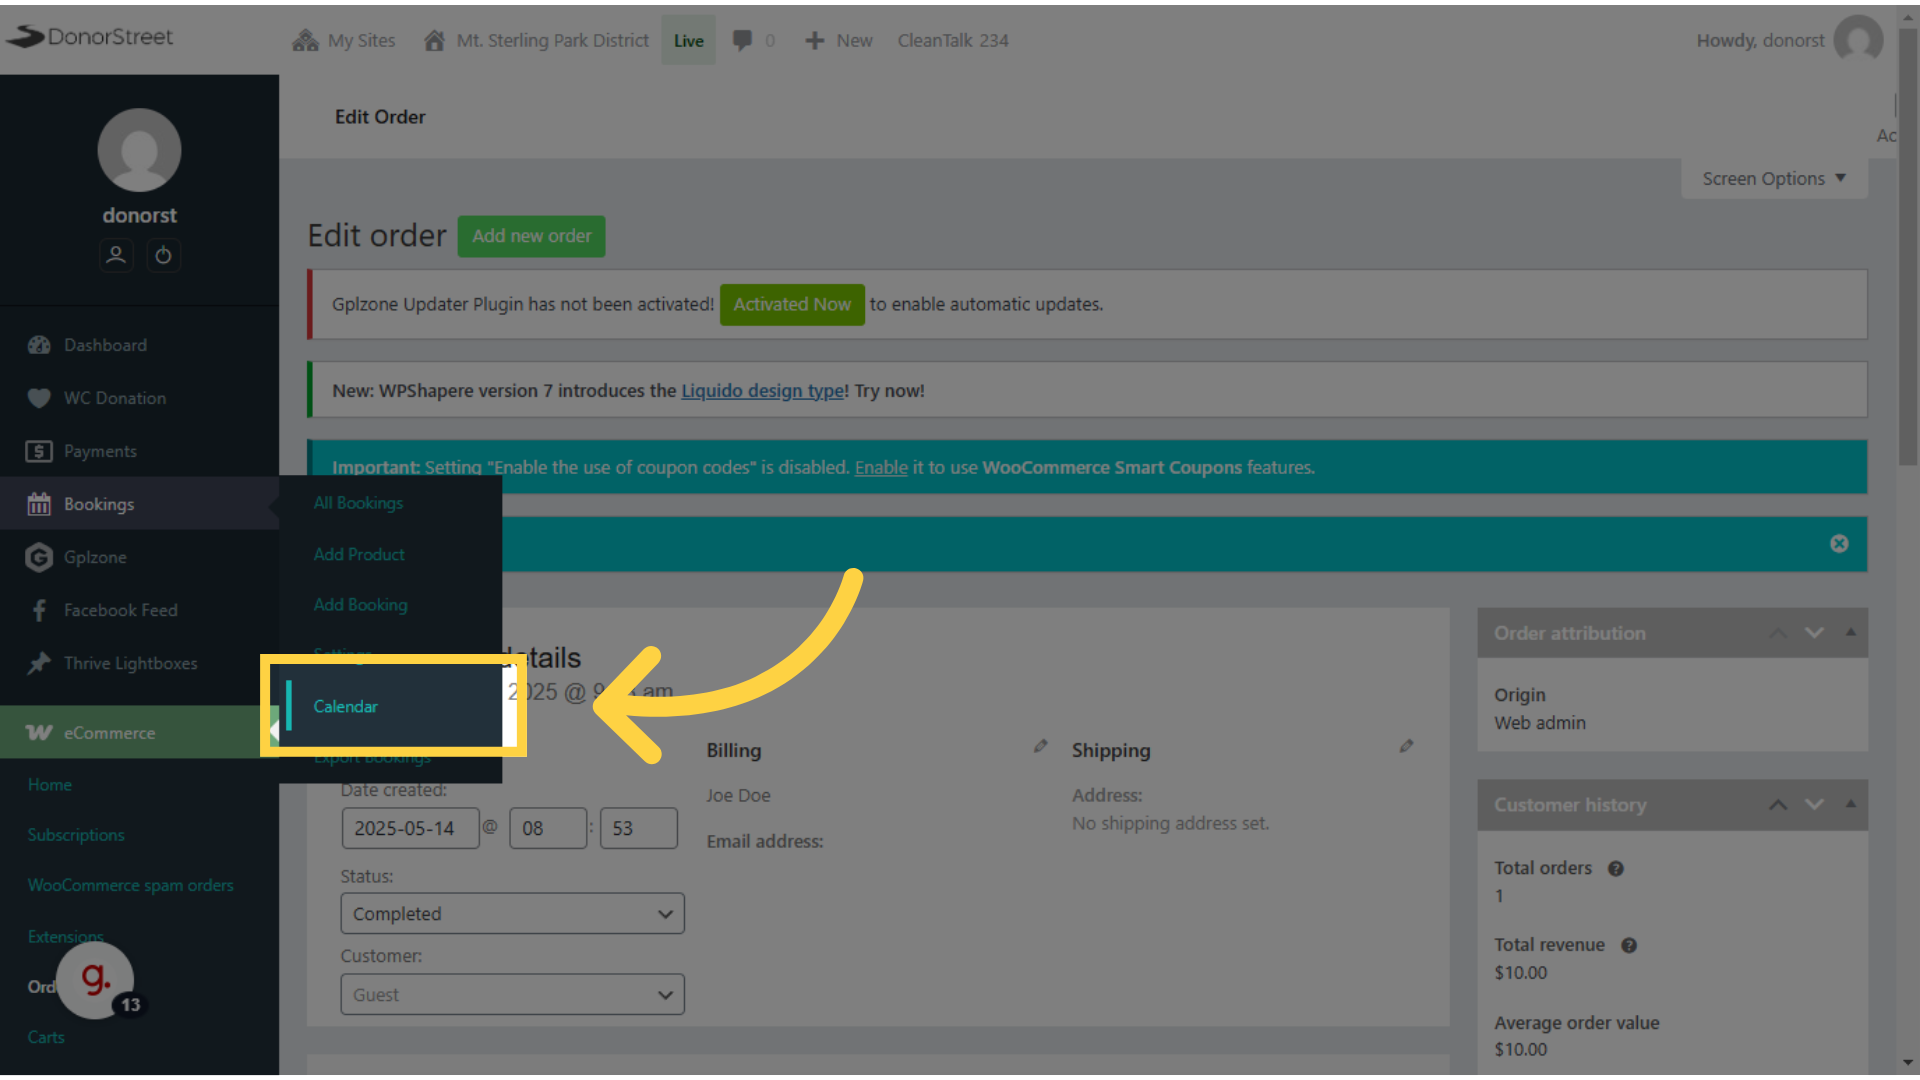
2. Click Bookings > Calendar #
Then you’ll be clicking on the bookings. Menu item. And under that, the calendar view is the most convenient.
 Calendar” />
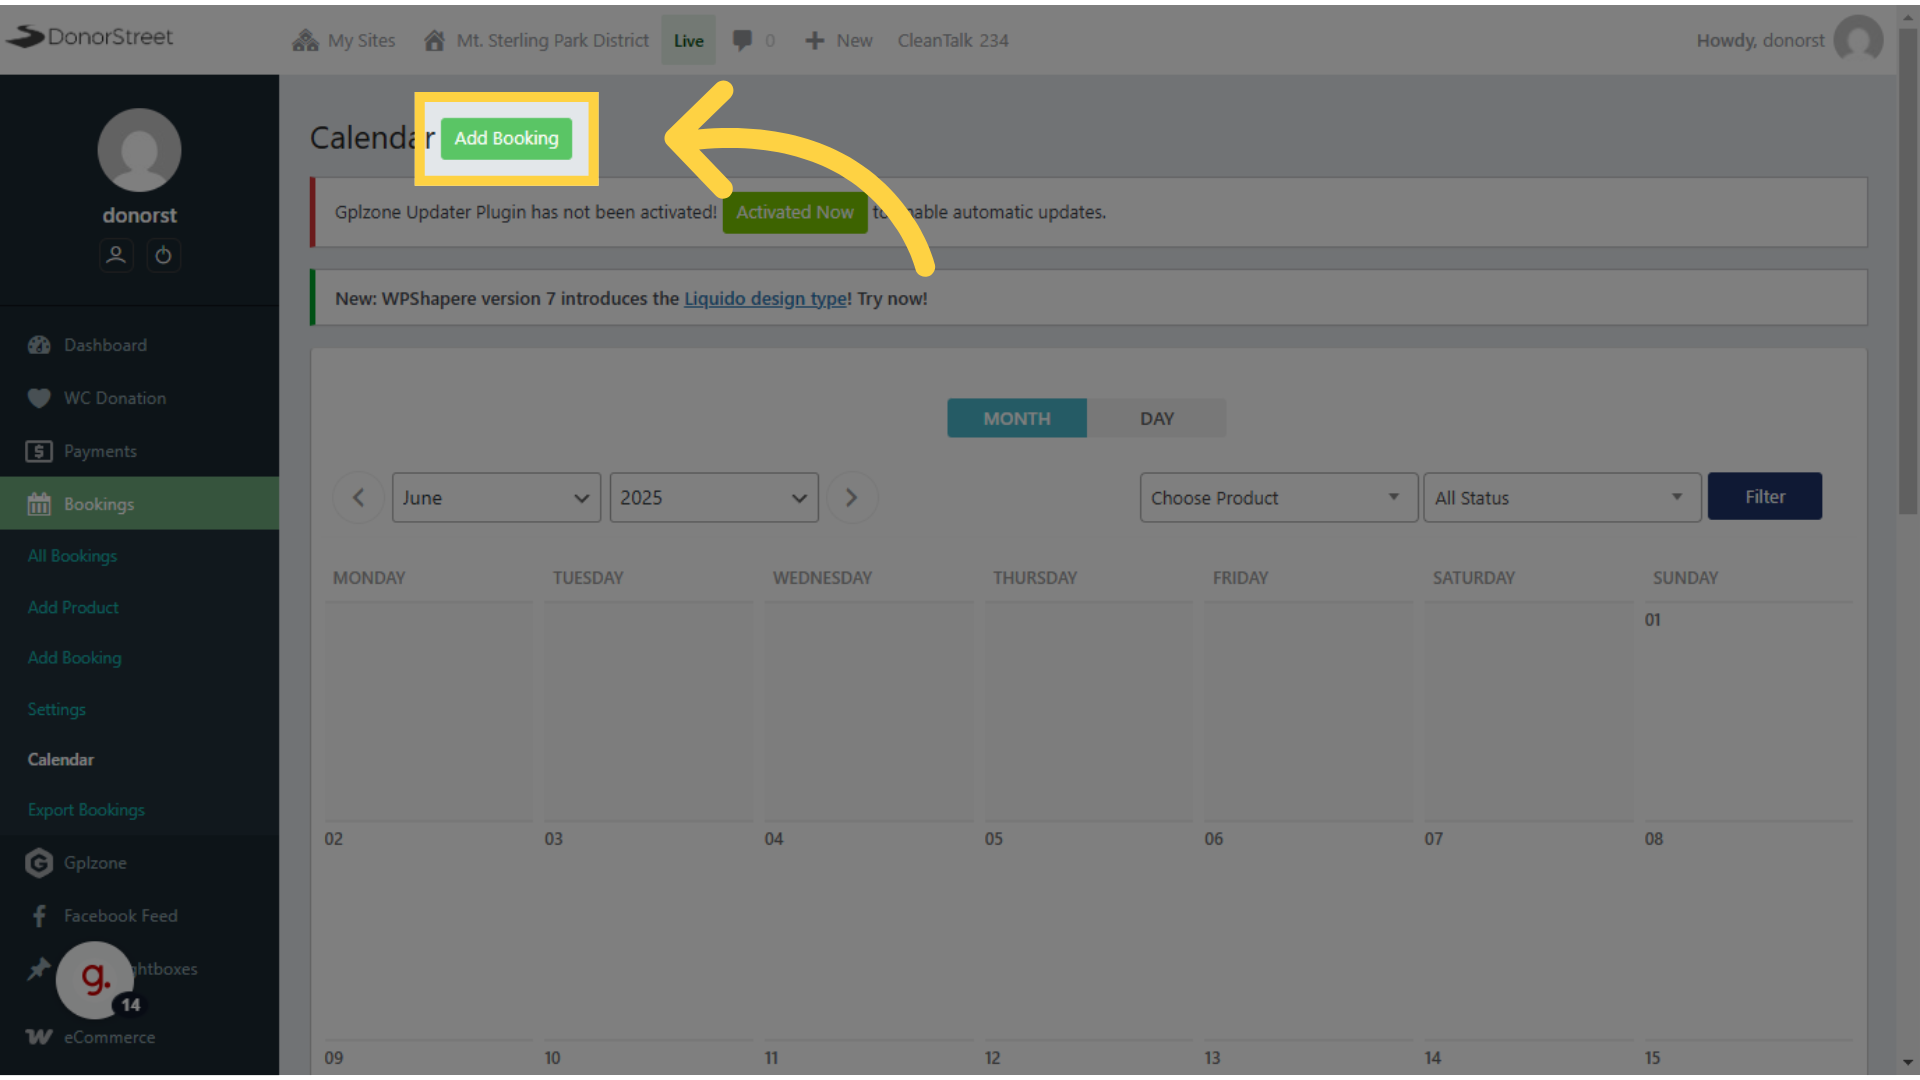
 3. Use arrows or dropdown to navigate months #
You can use the arrow keys or the drive down to navigate from month to month.
4. Click any booking # to see details #
Then click on any of the booking shown on the calendar to open the details of that booking.
5. If you need to cancel for a user, use the status dropdown #
You can view the details of each booking on its specific order page. If you need to cancel, somebody calls or emails, you, there is a status drop-down. And that can be set to cancel. And if you do that and then click update, it will be that item will free up that time slot on the calendar. That does not refund. Their order.
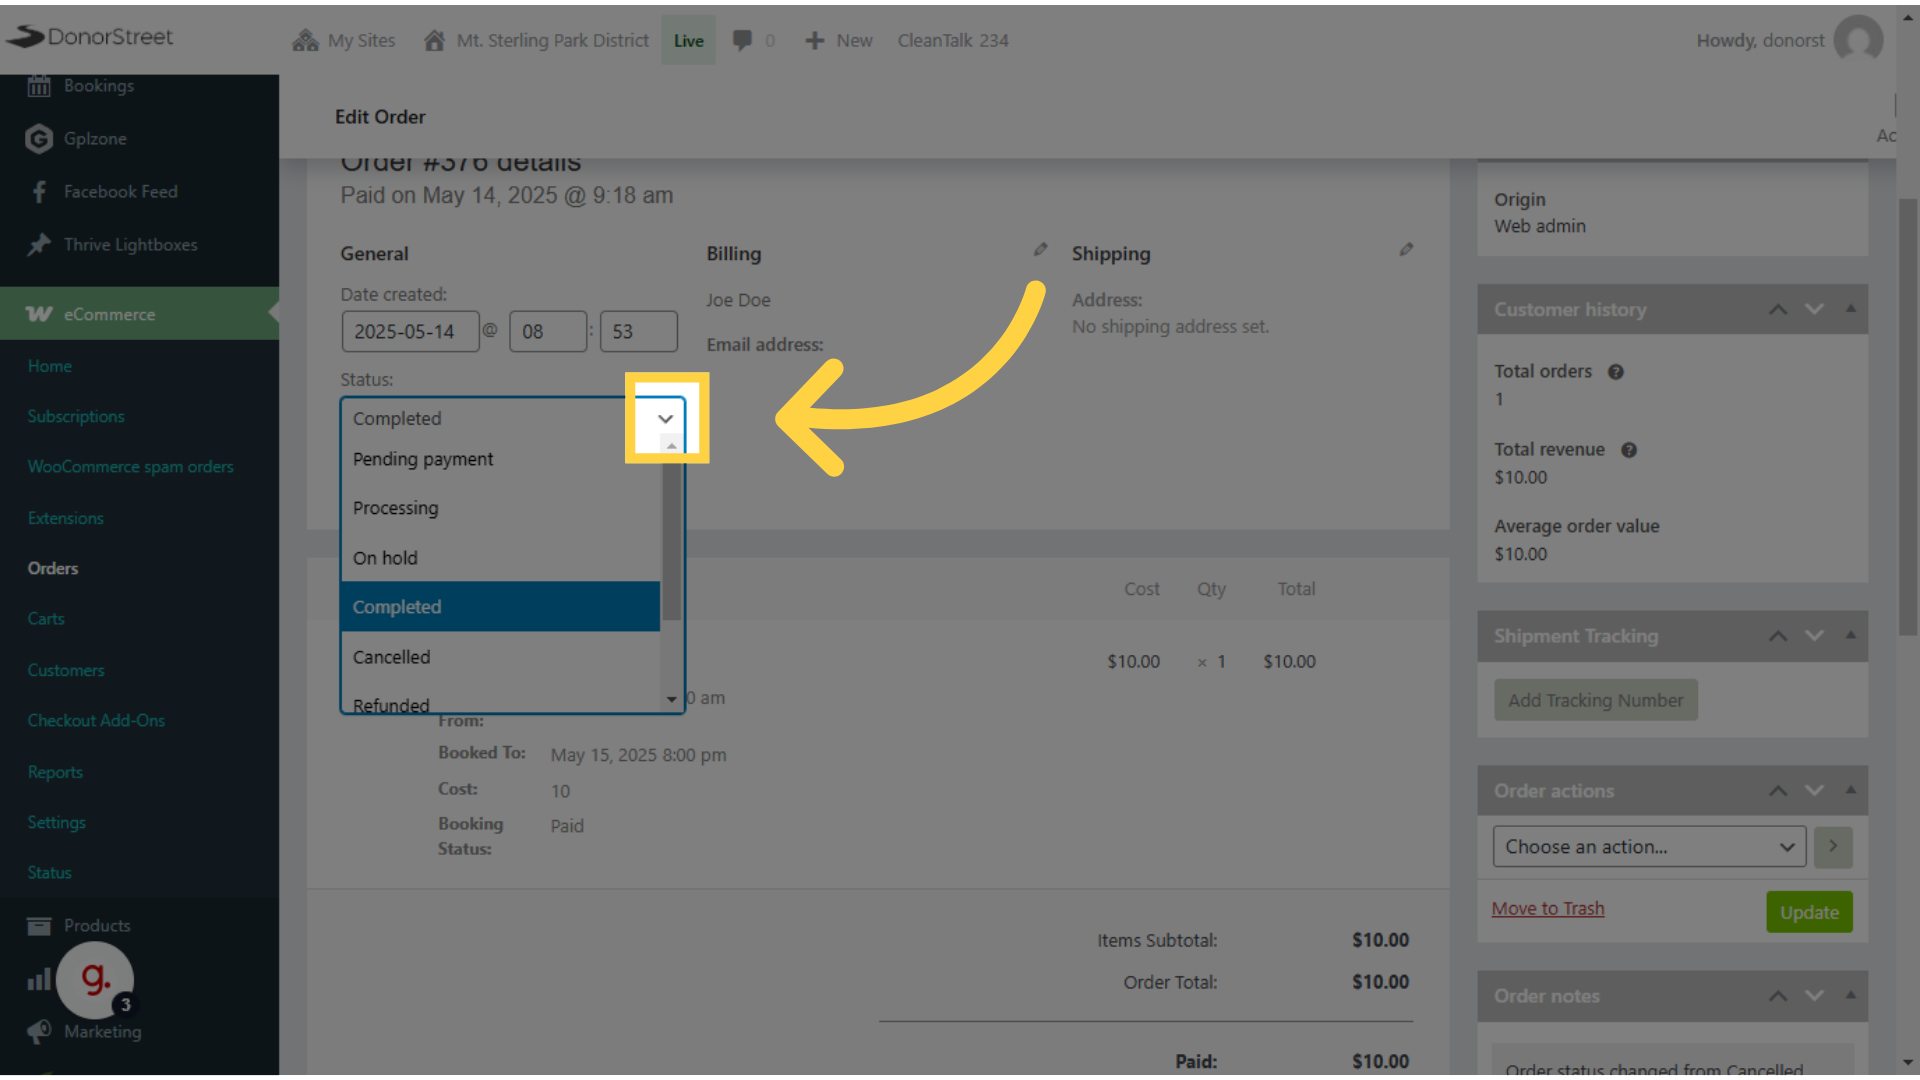
6. Click “Cancelled” if needed to manually cancel for the user. #
As I mentioned, if you need to cancel the order choose, this order status of canceled, that will trigger an email to the Customer and it will change the status on the calendar as well. It does not refund the fee. We’ll get to that in a moment.
7. If you need to also refund the fee, Click “Refund” #
So many times, the booking fee is non-refundable, we’ll have to create a policy for that. If that’s the case, if you do refund, then there’s a separate button on the lower left side of the order that allows you to click refund. And then, you’ll have to select the booking to refund.
8. Use the arrow to refund “1” next to the booking fee #
After you click refund, you’ll see a box open up beside or, under quantity for the booking, and you will set that to one. So, you are refunding, a quantity of one of that booking When you do that, there’s a button down below that says, refund that amount through stripe, and you’ll have to click that button.
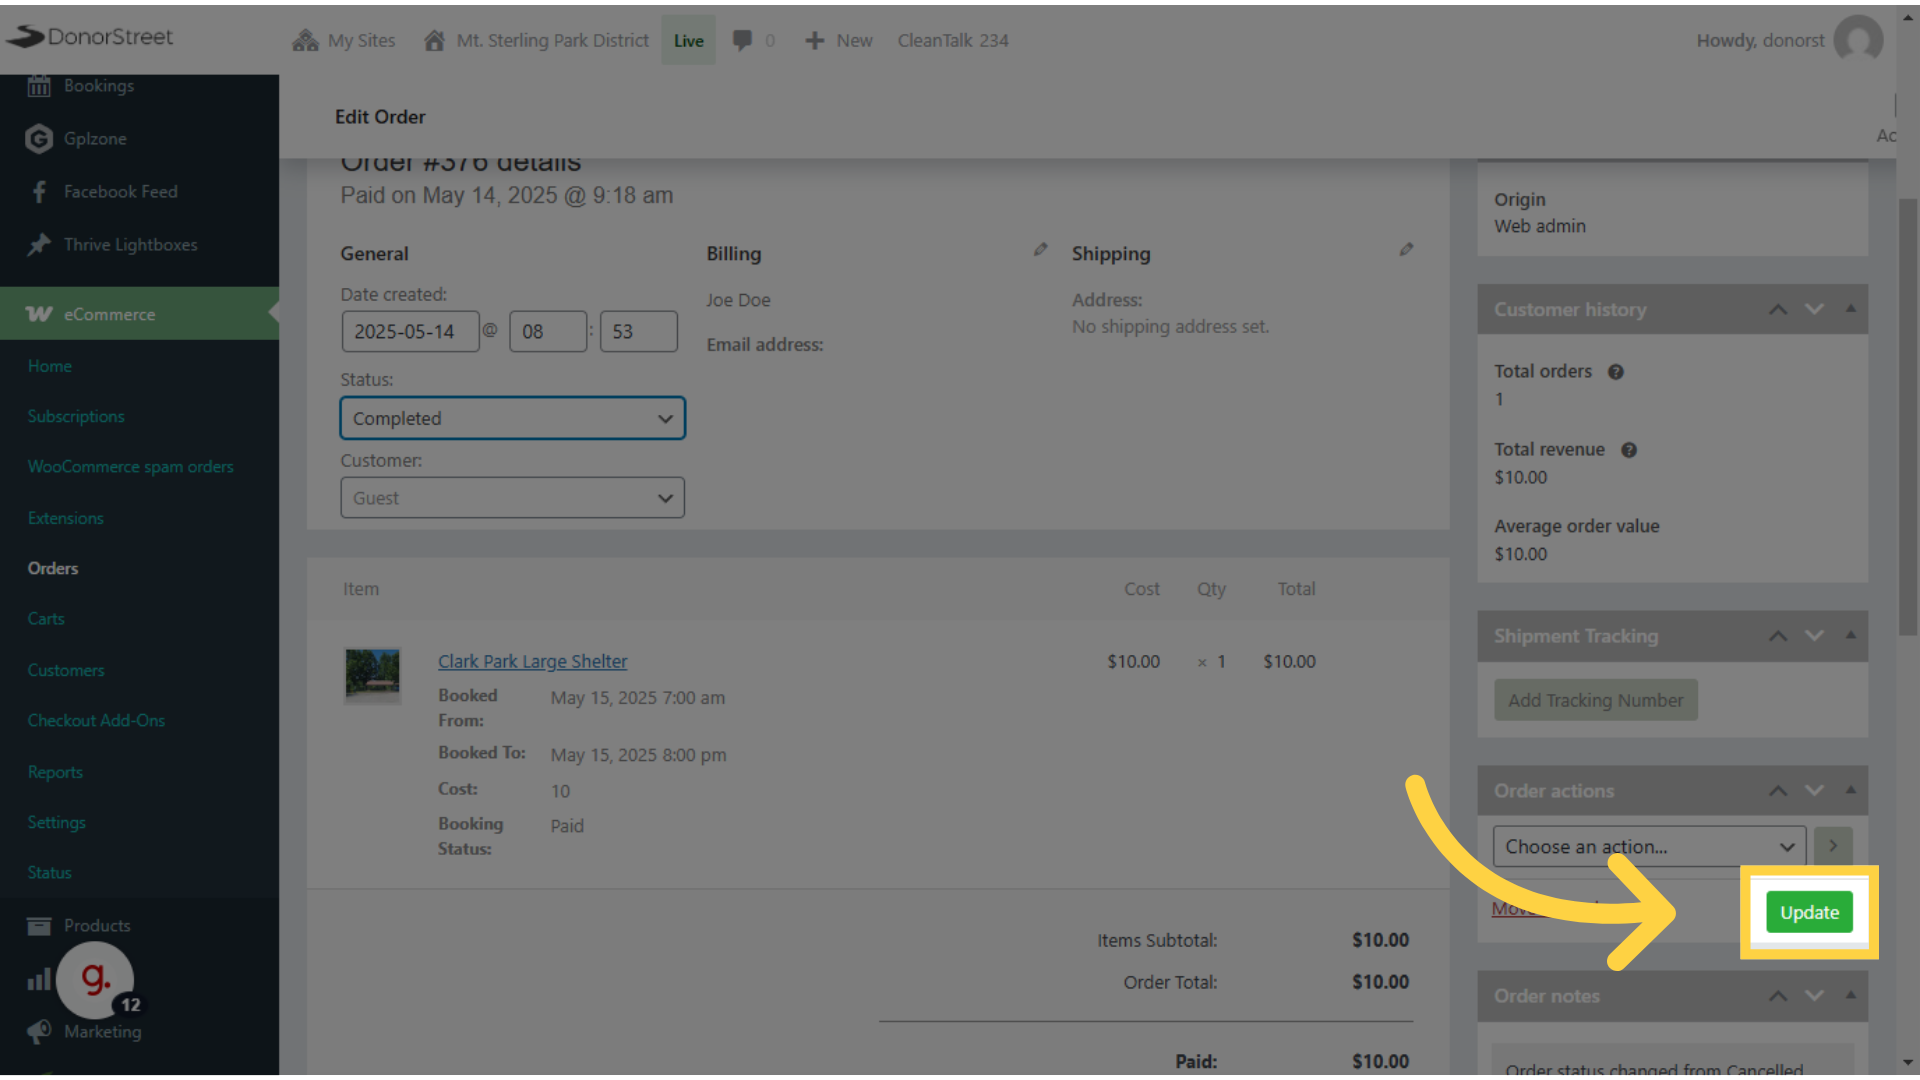
9. Click “Update” #
Once any status changes are done or refunds are issued or basically, anything is edited in this, you have to remember to click update, or those changes are not saved, and you’ll you won’t get the outcome that you want. So, click update before you leave the screen.
10. To manually add a booking, Click “Calendar” #
If someone calls or emails doesn’t use the web interface, you need to get their reservation into this system or it’s possible to double booked. So you’ll want to go back to bookings, calendar and start a new booking from there for them.
11. Click “Add Booking” #
Once on the calendar screen, you’ll see an ad booking button at the very top that’ll allow you to do a manual booking.
12. Start typing a name or email if previous customer, otherwise use “Guest” #
If a user has registered or use the system before their name and email will be available in the customer dropdown. If not, then you’ll have to check them out as a guest, that would be the quickest way to do it.

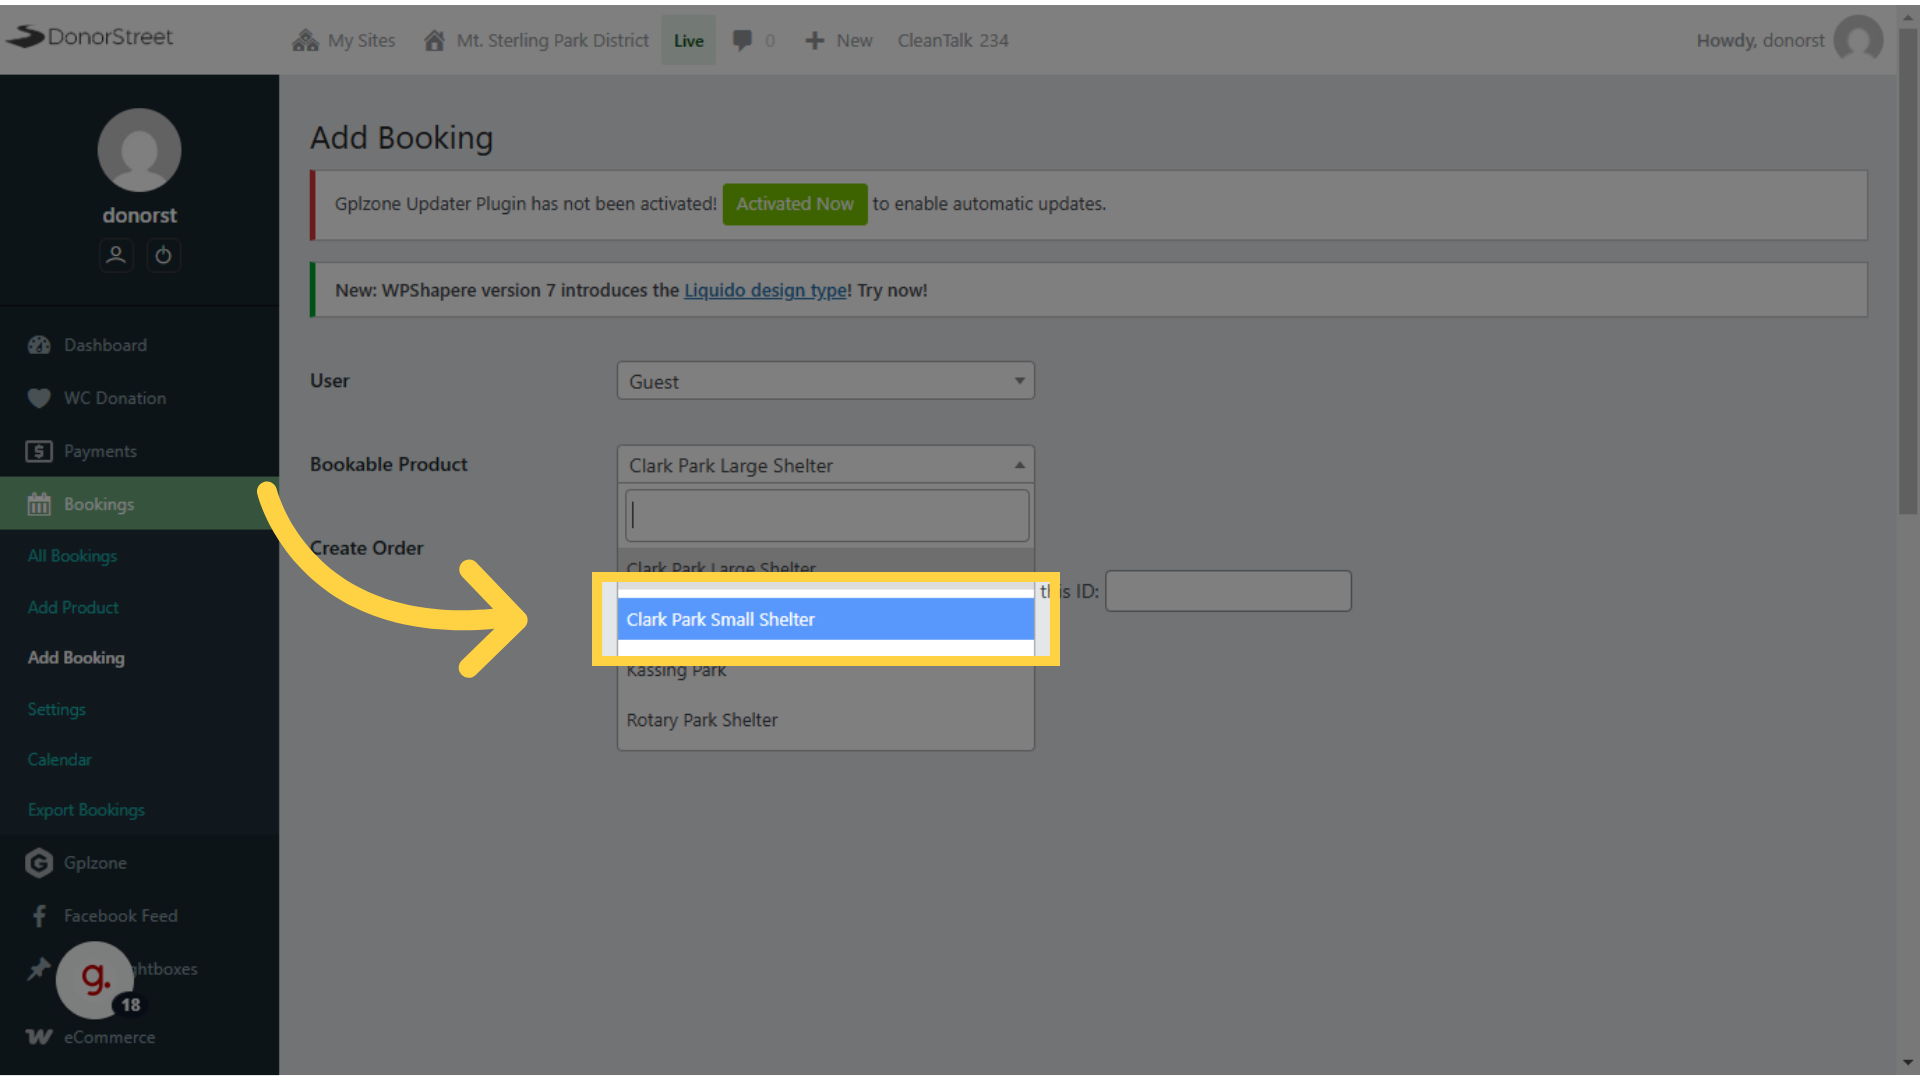
13. Select Shelter #
Next, you’ll need to select the shelter that they want to book.
14. Click “Create a new order.” #
And create new order would be need to be checked in order to create a new booking.
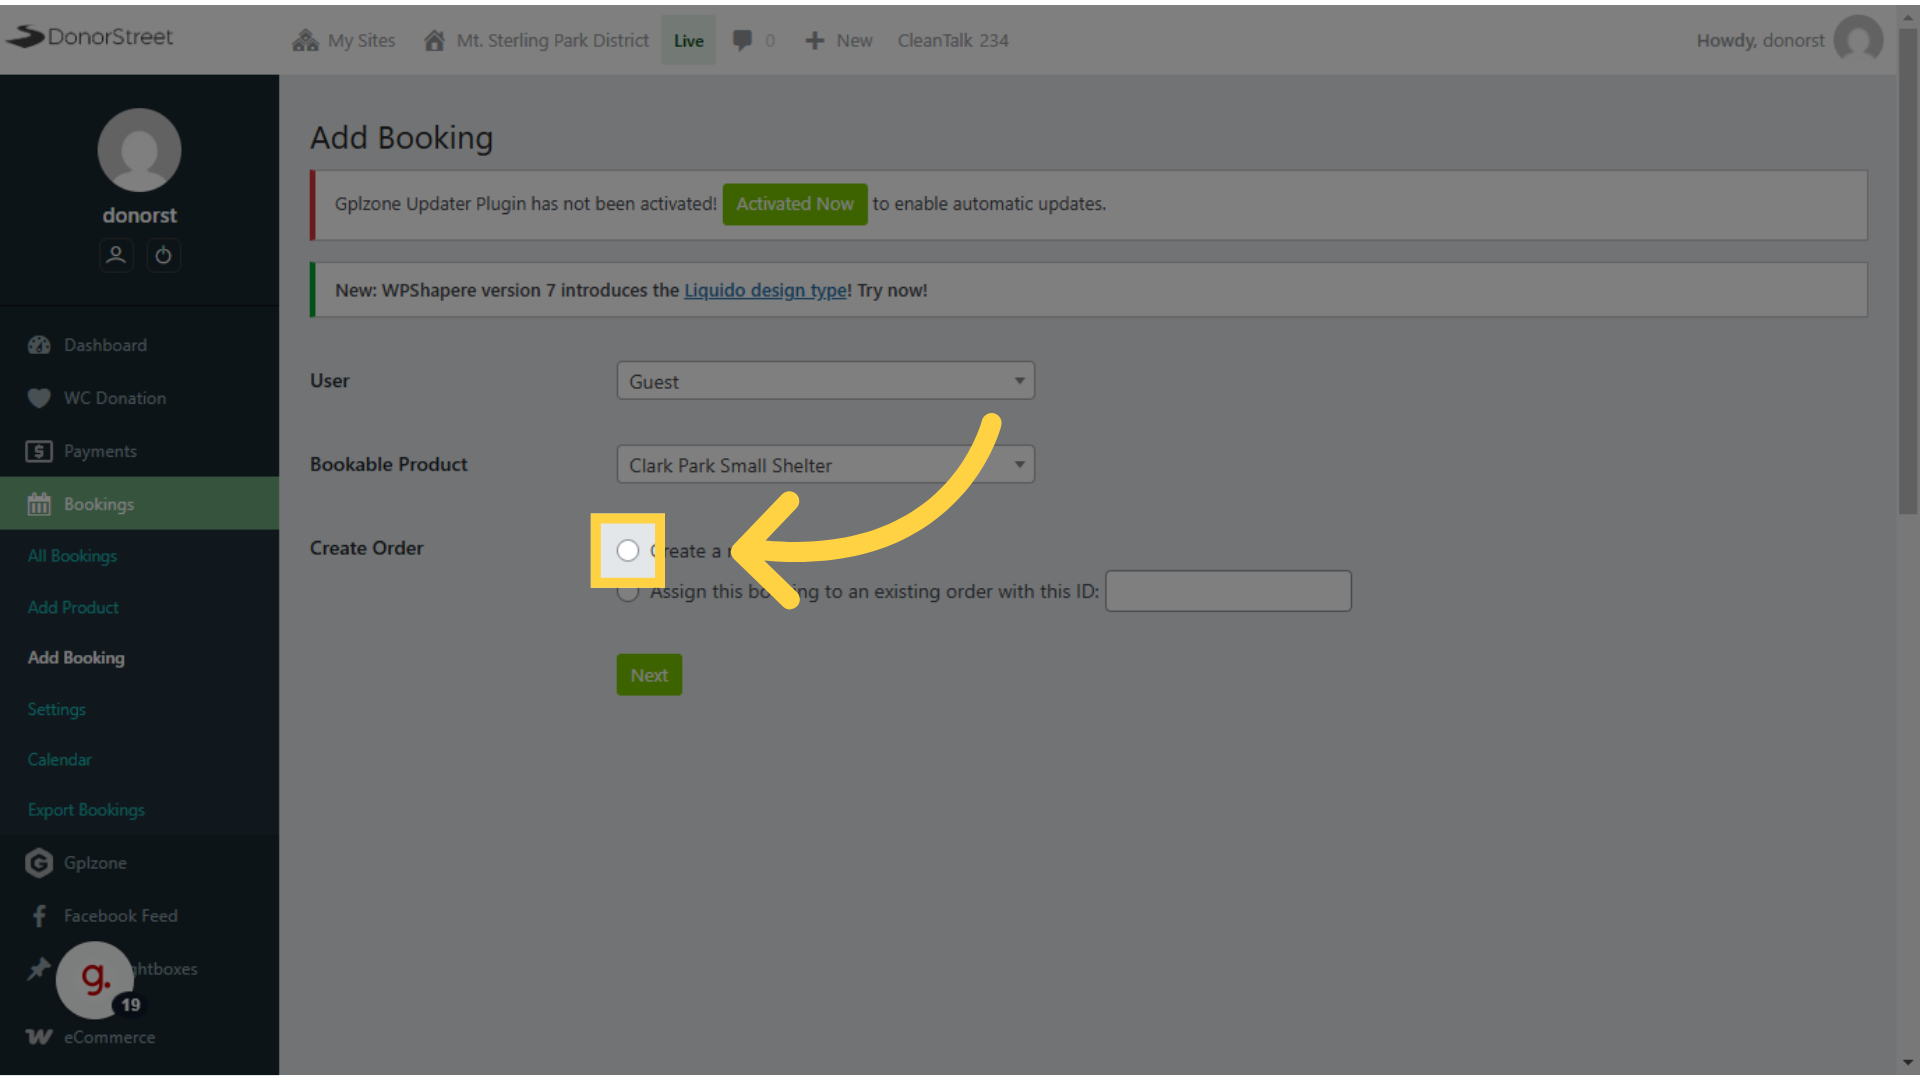
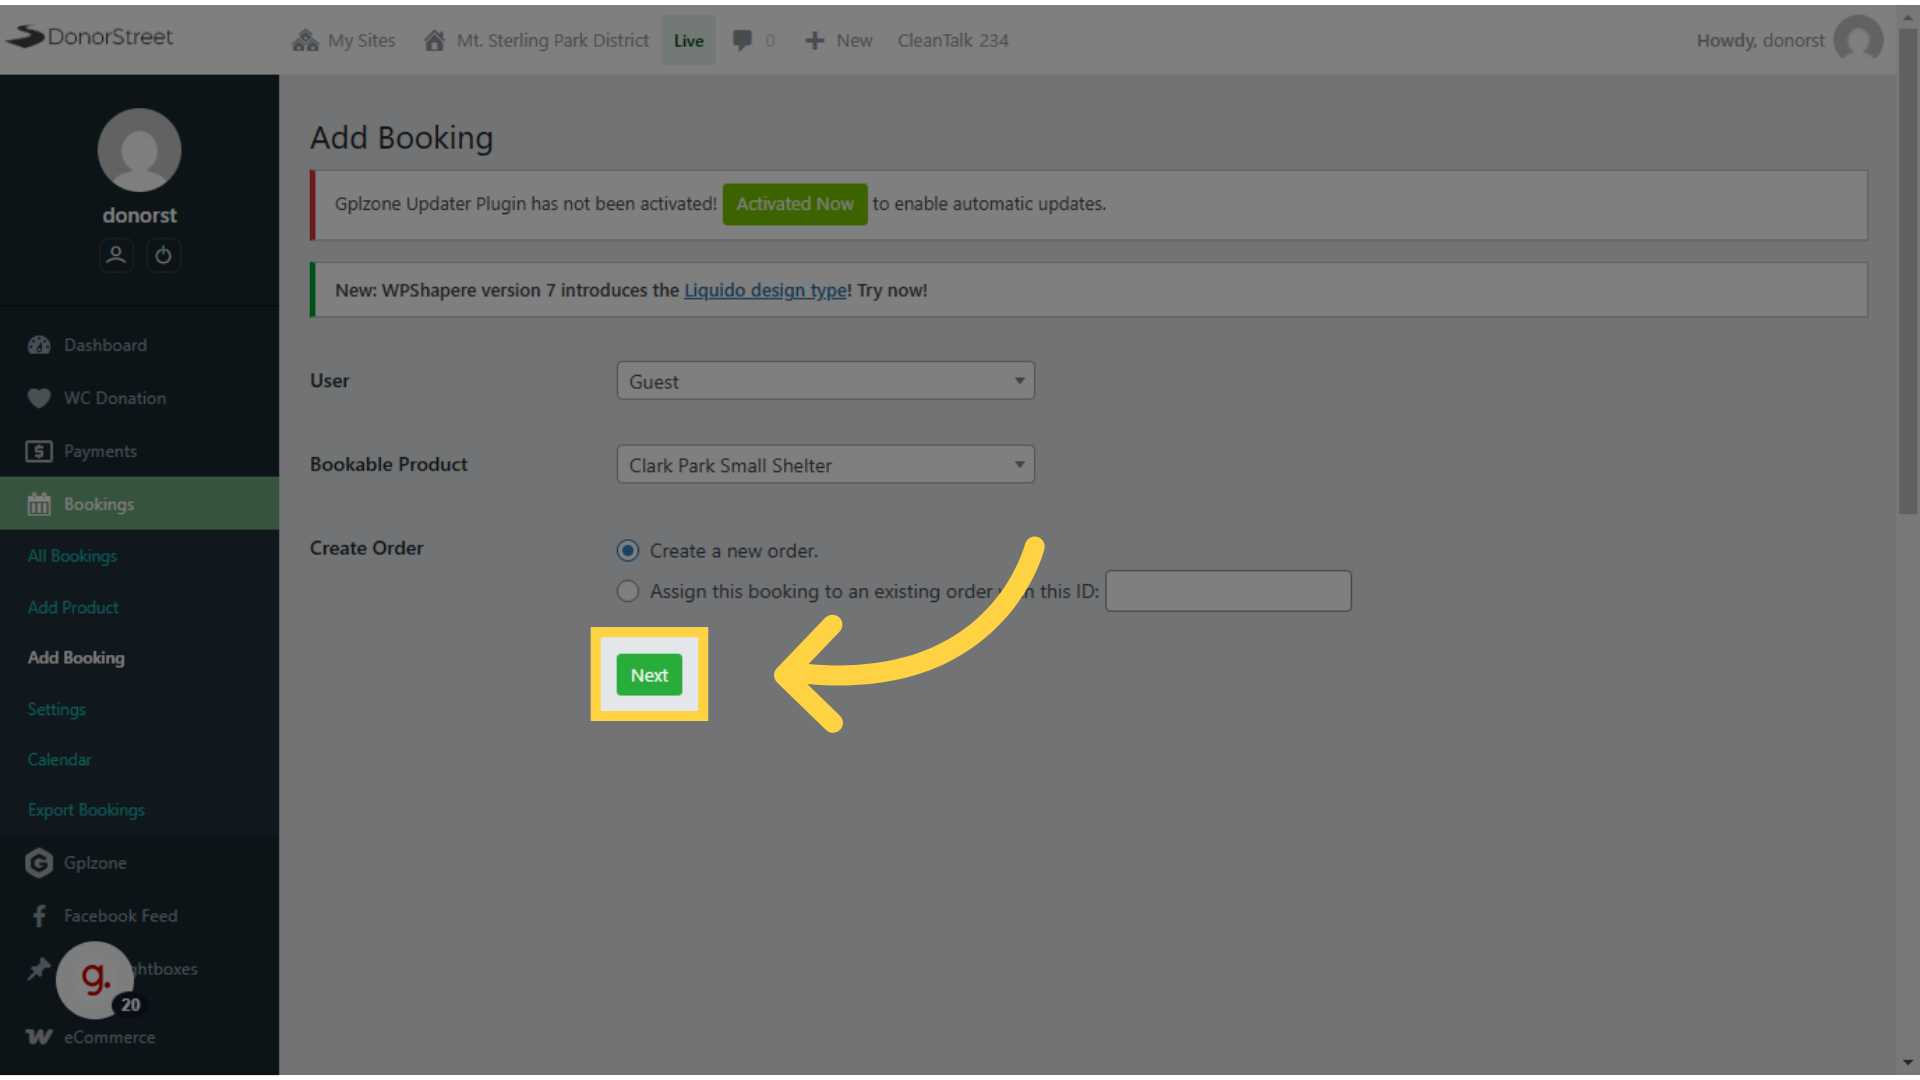
15. Click “Next” #
Then you’ll click next. To take you to the date. Calendar, date, and time screen.
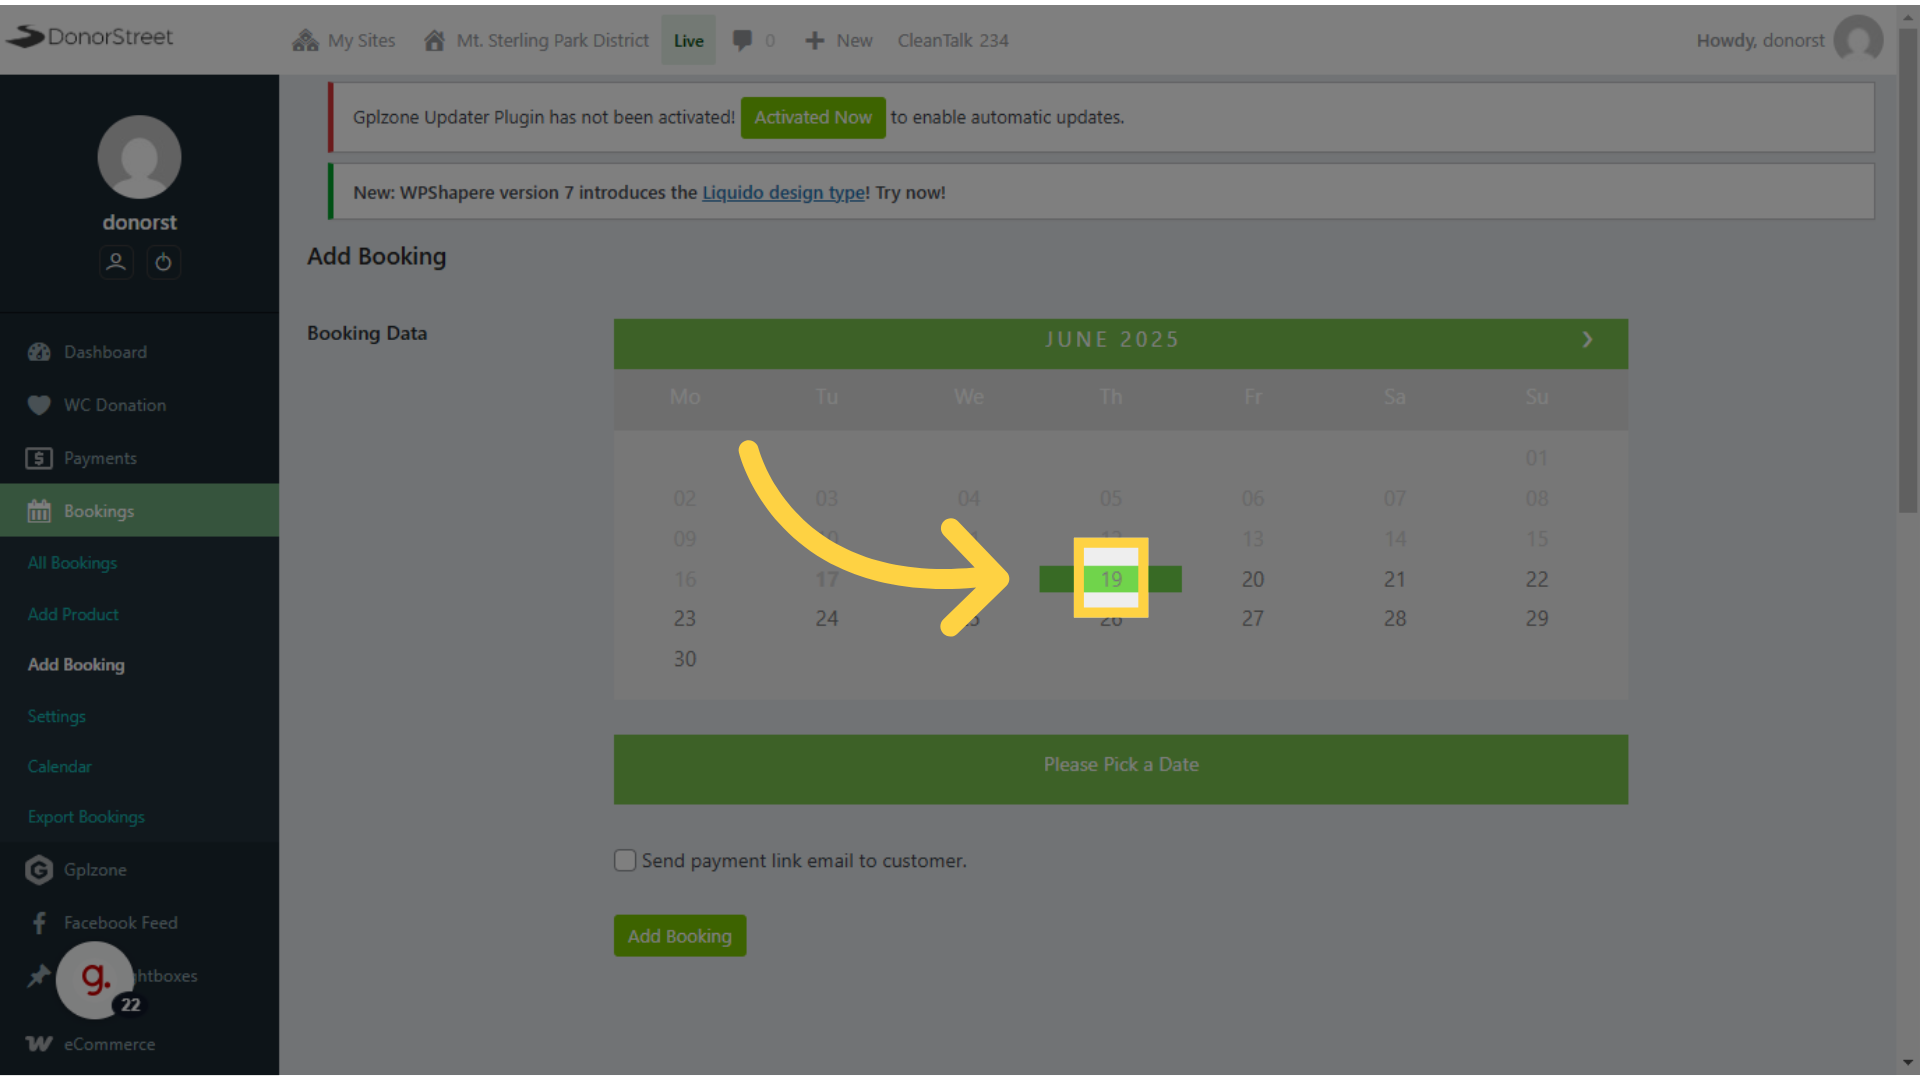
16. Choose a Date #
You know, select the date first.
17. Choose Start Time #
And then choose start time.
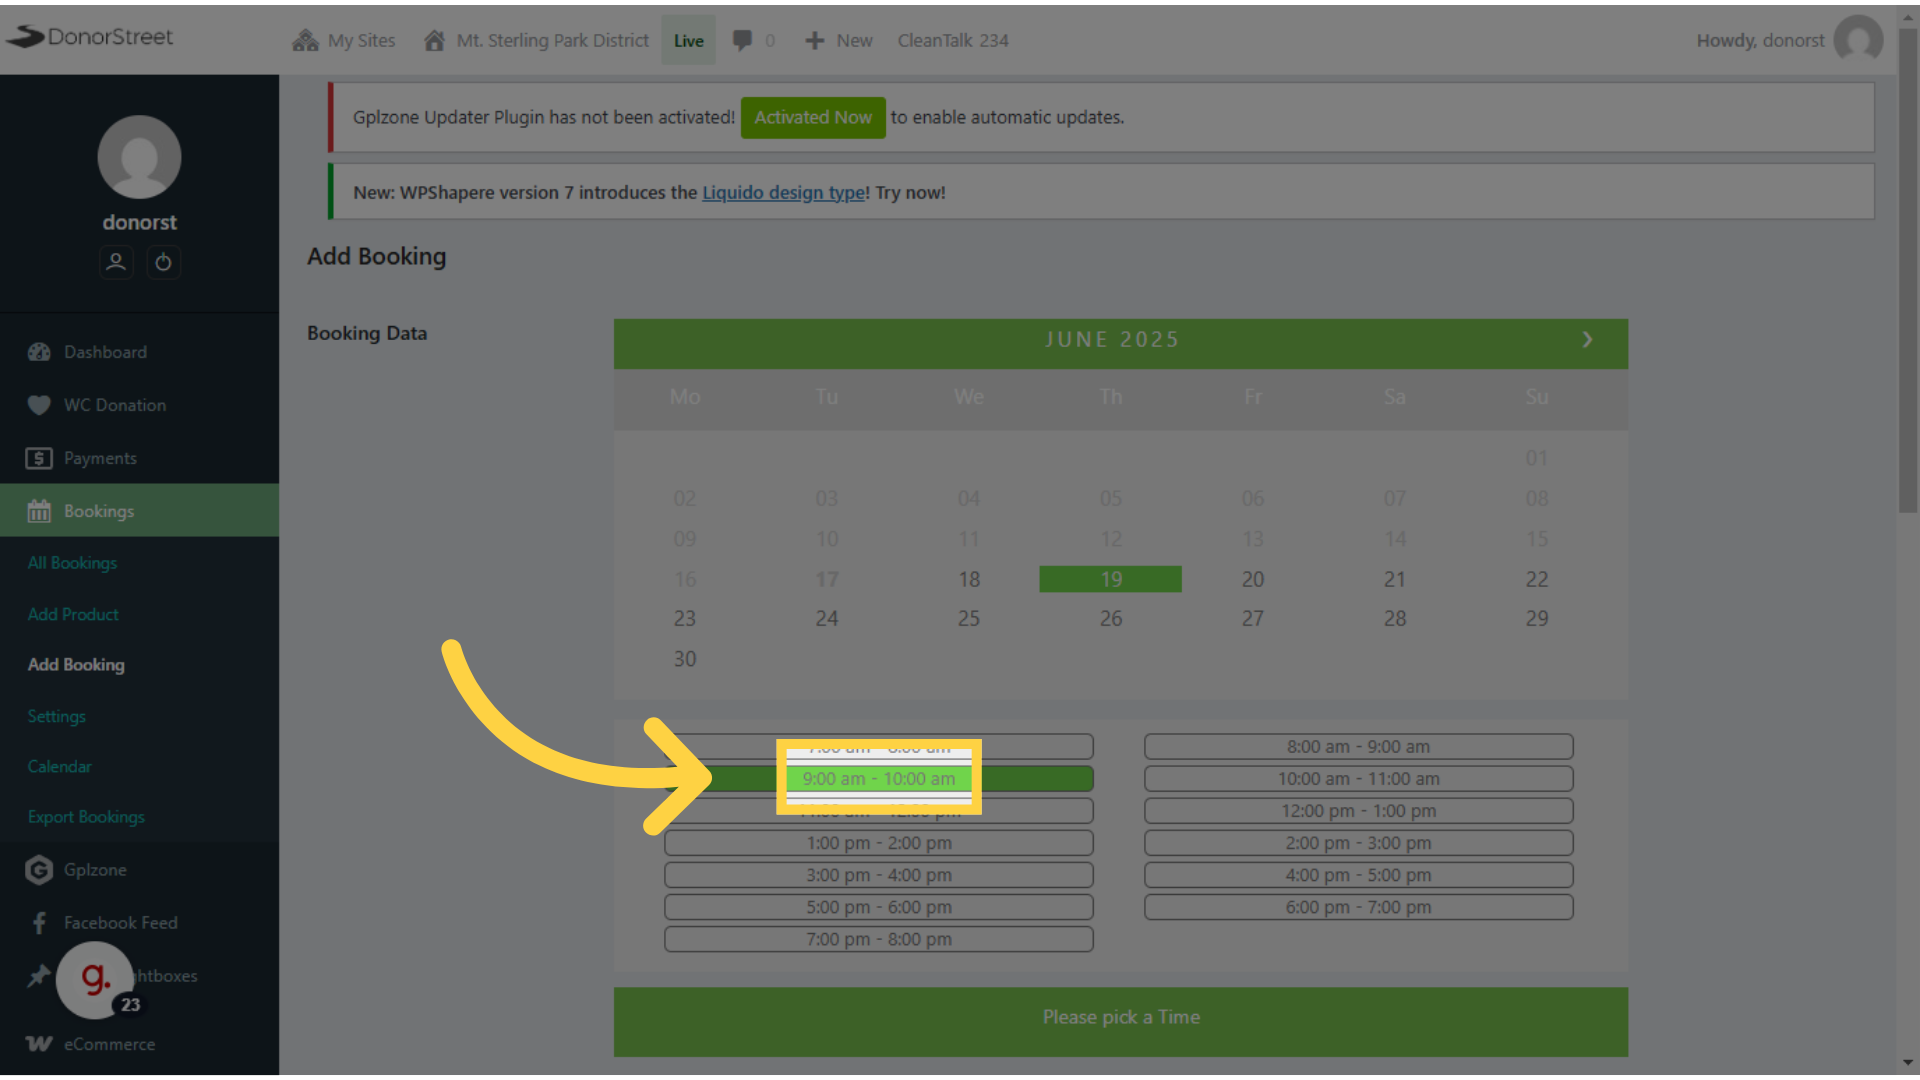
18. Choose End time #
And the end time.
19. Select to send an invoice for online payment or just leave blank if they pay directly. #
I’m guessing most of the time, the send payment checkbox will be empty and they’ll be paying in person, but if you do want to send them an email, with that information to pay online, you can, you will have to put in their email address after you click the checkbox.
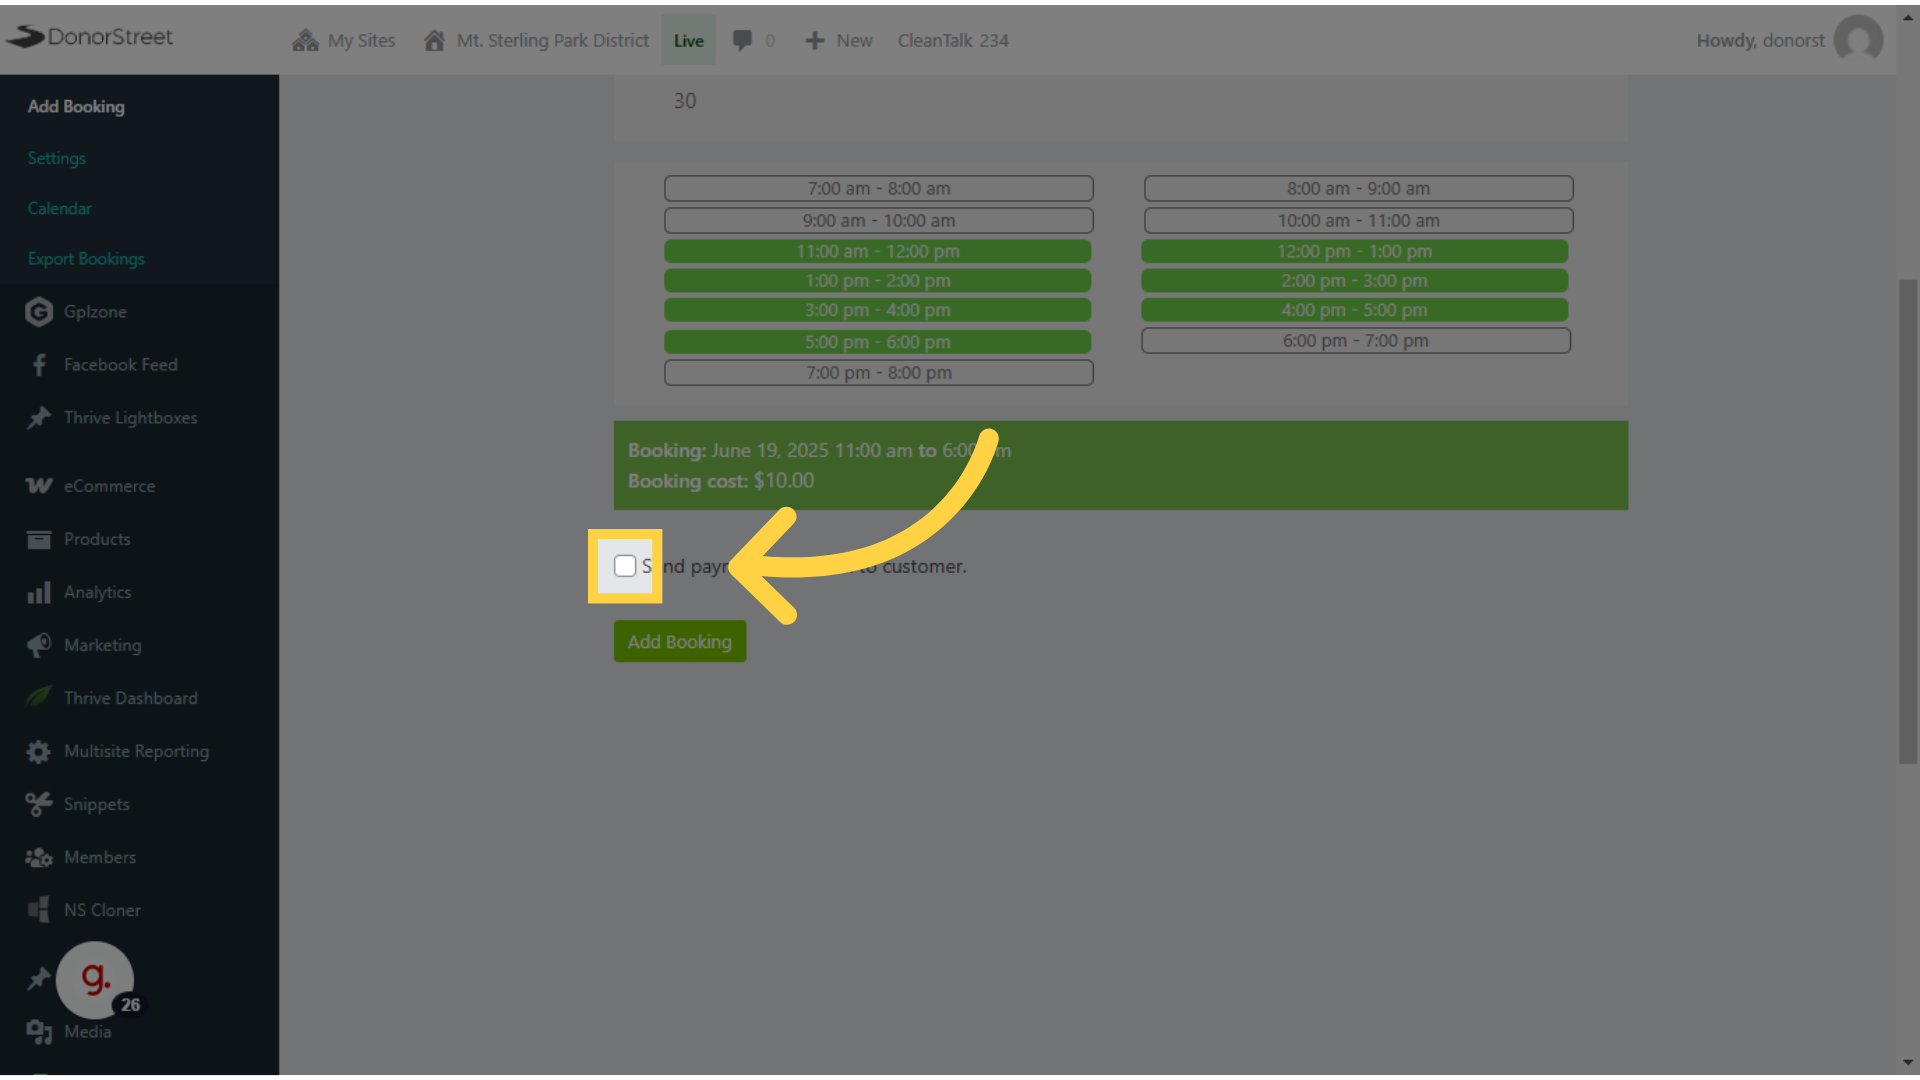
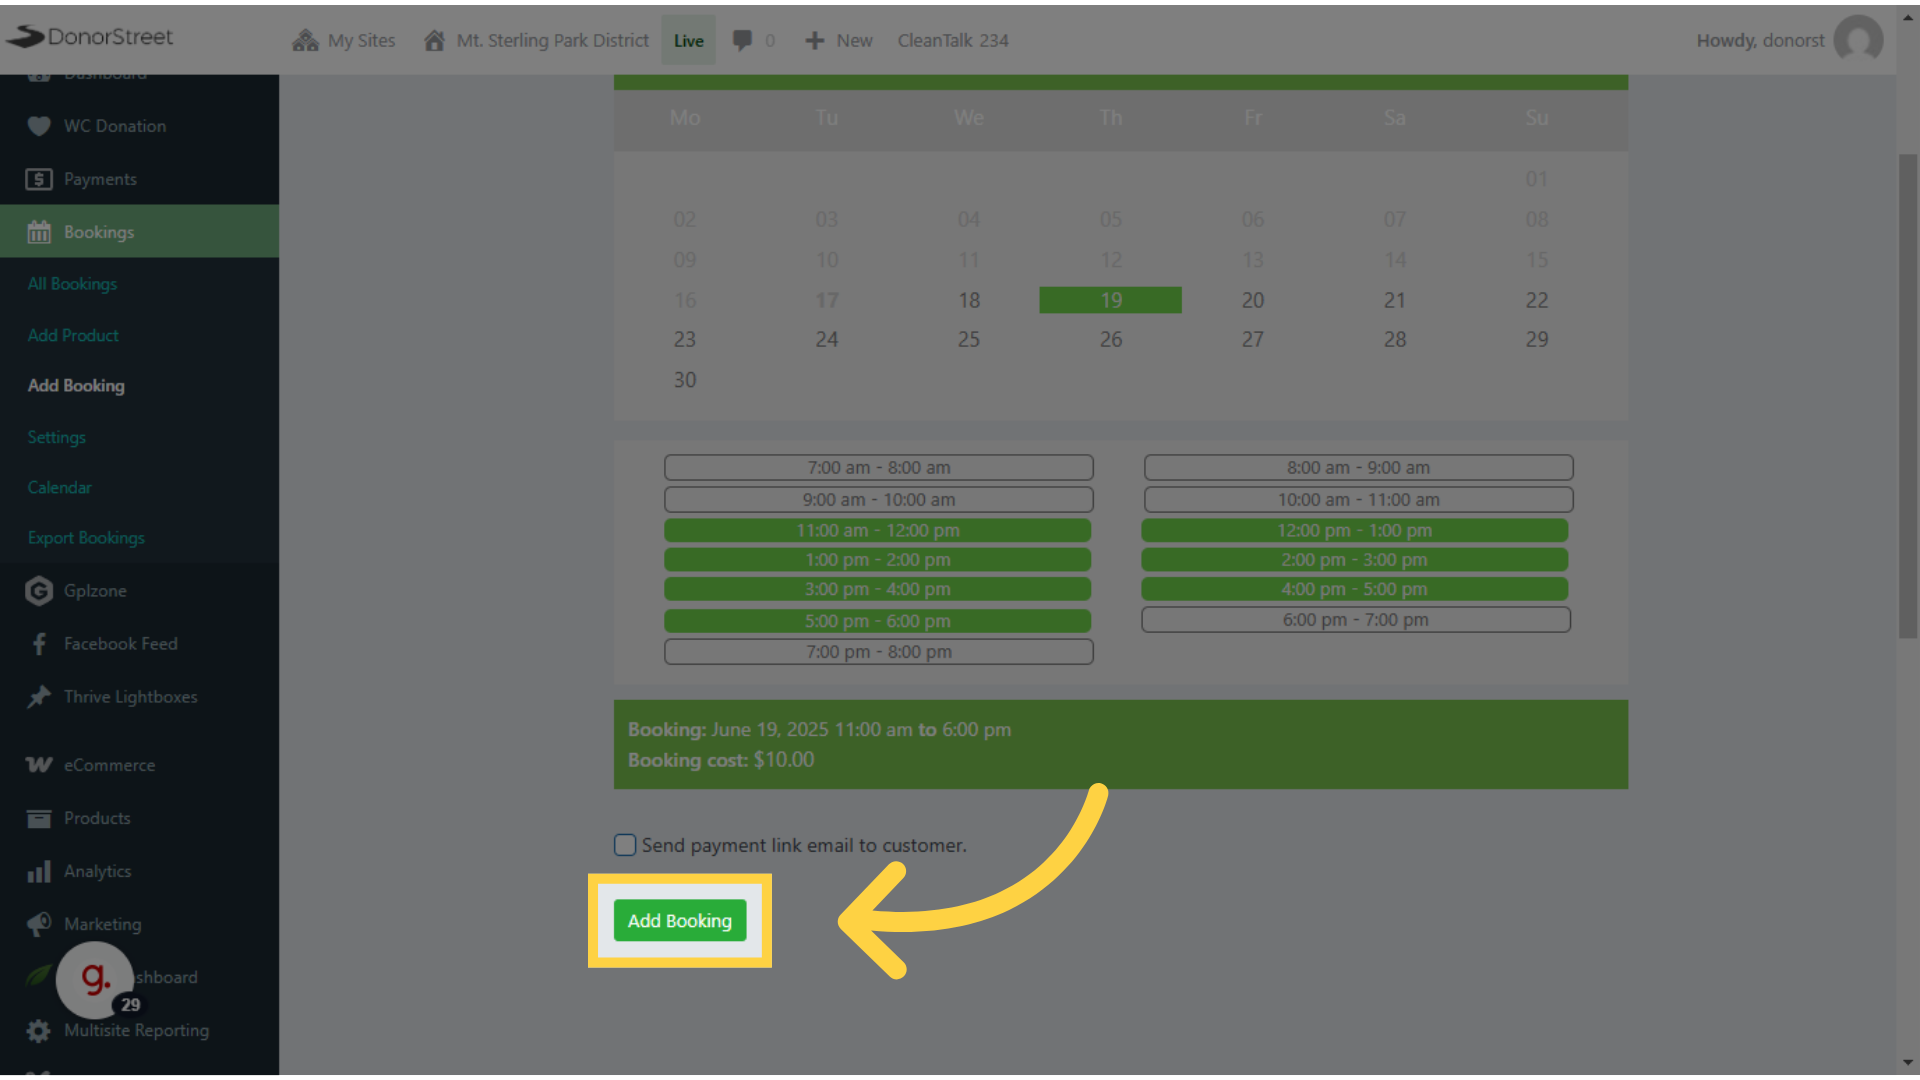
20. Click “Add Booking” #
Once you click add booking, then that booking is saved. It immediately goes on the calendar and it immediately gets blocked in the system. So it can’t be double booked.
21. To add contact info to this booking, use the edit (pencil) icon. #
The drawback to using the guest option for adding a new booking is that you don’t get any contact information for that user on the booking itself. So when the booking screen comes up you’ll want to use the pencil icon for billing information and that will allow you to put in the name address phone number email, whatever you information you want or need.
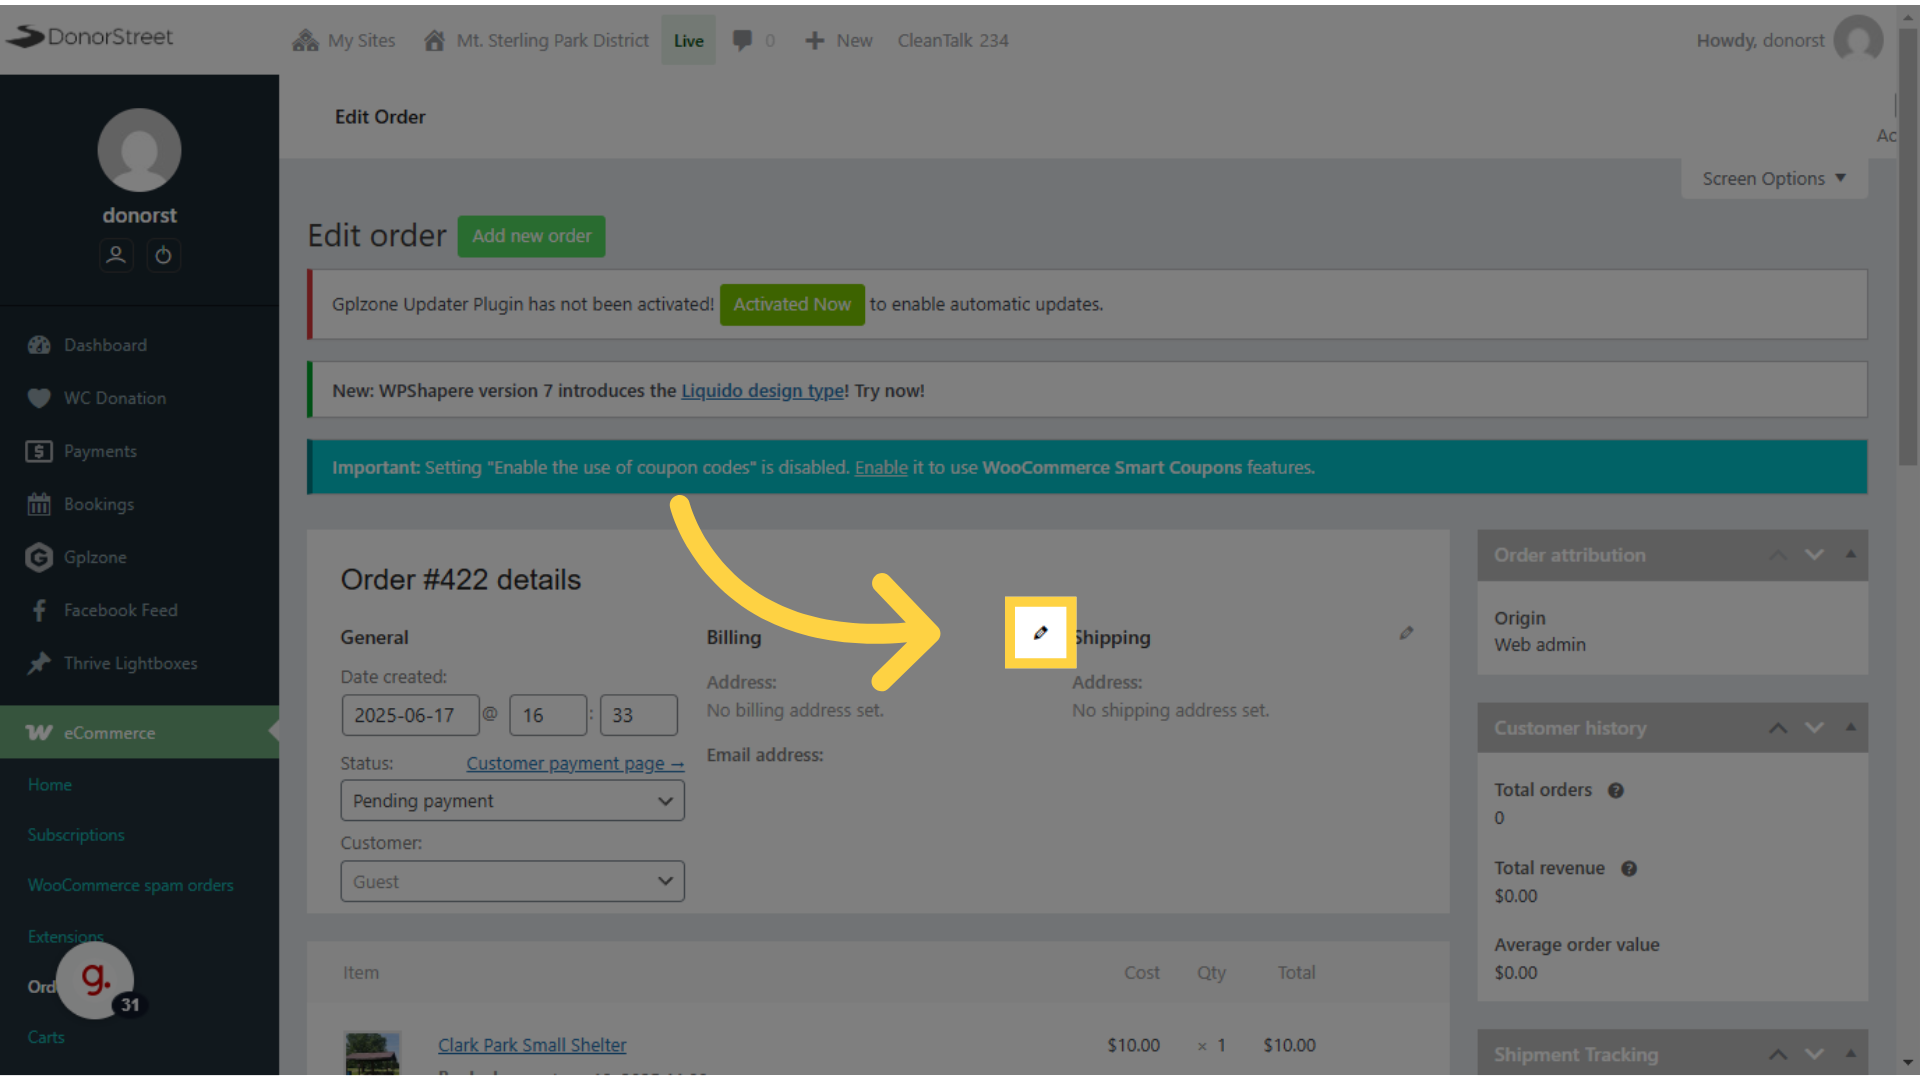
22. Click “First name” #
At the minimum, I would recommend the first name.
23. Last Name #
The last name.
24. Click “Email address” #
And the email address.
25. Click “Update” #
Again, since you’ve made changes to the order. Don’t forget to click update before leaving that page.

In just a quick reminder, new bookings changes to bookings. They all trigger emails out of the system automatically, some of those emails go to you as an admin and we have emails that go out to the people booking as well. So you can view those in the system. You can see them go out. We have an email logging option in the normal dashboard.